Beginner Woodworking Setup Guide: Tools, Space, and Budget
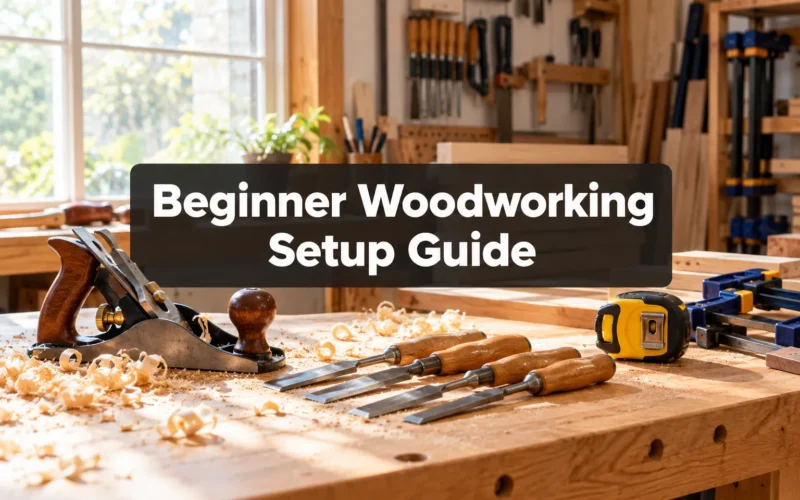
Most new woodworkers spend their first two hundred dollars on the wrong things. They buy a table saw before they own a single clamp, or they fill a cart with specialty jigs before they’ve cut a straight line with a hand saw. A proper beginner woodworking setup guide covering tools, space, and budget saves you from that mistake by telling you what to buy first, how much room you actually need, and what a realistic starting budget looks like.
This guide walks through the tools worth owning on day one, how to carve out workshop space in a garage, shed, or apartment, and how to budget without overspending on gear you won’t touch for months. It also covers common beginner mistakes, safety basics, and where to start if you’d rather teach yourself than take a class.
Find this useful? Add us as a preferred source on Google and more of what we publish will show up in your results.
What tools do I actually need to start woodworking
A beginner needs a short list of measuring, cutting, and joining tools, not a full shop. Start with a tape measure, combination square, hand saw, chisel set, clamps, a hammer or mallet, and sandpaper. Everything else can wait.

Here is a practical starter list, grouped by function:
- Measuring and marking: tape measure, combination square, pencil, marking gauge
- Cutting: a good hand saw (crosscut or Japanese pull saw) and a basic chisel set
- Joining and holding: at least four bar or F-style clamps, wood glue
- Shaping and finishing: a block plane, sandpaper in several grits, a random orbit sander if budget allows
- Driving and fastening: a cordless drill/driver with basic bits
Decision rule: if you’re not sure whether to buy a tool yet, wait until a specific project requires it. Buying reactively, project by project, keeps spending under control and teaches you what you actually use. For a deeper breakdown of starter gear, see this guide to various tools used for woodworking and this list of beginner woodworking tools and equipment.
A common mistake is buying a full table saw and router combo before completing a single project with hand tools. Skipping that step often leads to expensive machines sitting unused because the builder never learned basic layout and joinery first.
Hand tools vs. power tools: which should beginners buy first
Beginners should buy hand tools first, then add power tools only when a project genuinely demands speed or repetition. Hand tools are cheaper, quieter, safer, and teach you to read wood grain in a way power tools don’t.
A simple way to think about it:
| Factor | Hand tools | Power tools |
|---|---|---|
| Cost to start | Low ($50-150) | Higher ($150-600+) |
| Learning curve | Slower, more feel-based | Faster results, less feedback |
| Noise and dust | Minimal | Significant |
| Space needed | Small bench or table | Dedicated area, often with ventilation |
| Best for | Joinery, fine shaping, small shops | Repetitive cuts, large stock, production work |
Choose hand tools first if you’re working in an apartment, a shared garage, or any space without room for dust collection. Choose power tools earlier if you have a dedicated shed or garage bay and plan to build larger furniture pieces regularly. A circular saw is often a better first power tool than a table saw because it’s portable and cheaper; this comparison of the table saw versus circular saw breaks down which to buy first in more detail. For hand tool specifics, this beginner hand tool woodworking kit guide lists exact pieces and approximate costs.
How much space do I need for a home woodworking workshop
A workable beginner shop needs roughly 80 to 150 square feet, enough for a workbench, a small assembly area, and walking room around both. A one-car garage bay, a garden shed, or even a cleared corner of a basement can work if ventilation and lighting are reasonable.
Minimum space guidelines:
- Workbench footprint: about 24 by 48 inches, plus 3 feet of clearance on the working side
- Material storage: a wall rack or vertical rack for lumber keeps the floor clear
- Assembly space: enough open floor to lay out a project at full size
- Power tool clearance: if you add a circular saw or miter saw station, add another 3 to 4 feet of clearance in front
Edge case: if your space is under 60 square feet, lean toward hand tools and a folding or wall-mounted workbench that stores flat when not in use. For a full planning walkthrough, this home woodshop setup guide covers layout, lighting, and electrical considerations beyond what fits here.
Can I do woodworking in a small apartment or garage
Yes, apartment and shared-garage woodworking is realistic if you stick to hand tools and quiet, low-dust techniques. Hand planes, chisels, and hand saws produce far less noise and mess than power tools, which makes small or shared spaces workable.
Tips for tight spaces:
- Use a portable workbench that folds flat against a wall or under a bed
- Choose project sizes that match your space, such as boxes, cutting boards, and small shelves, before attempting furniture
- Work on a balcony, porch, or near an open window for ventilation when sanding or finishing
- Store lumber vertically in a closet or behind furniture rather than flat on the floor
If you later move to power tools, a track saw or circular saw with a dust bag is more apartment-friendly than a table saw, which needs space on all four sides and produces more airborne dust.
What’s a realistic budget for a beginner woodworking setup
A reasonable first-year budget for a beginner is between 200 and 600 dollars for hand tools and basic safety gear, or 600 to 1,500 dollars if you add one or two entry-level power tools. Spending beyond that in year one rarely improves results and often leads to unused equipment.
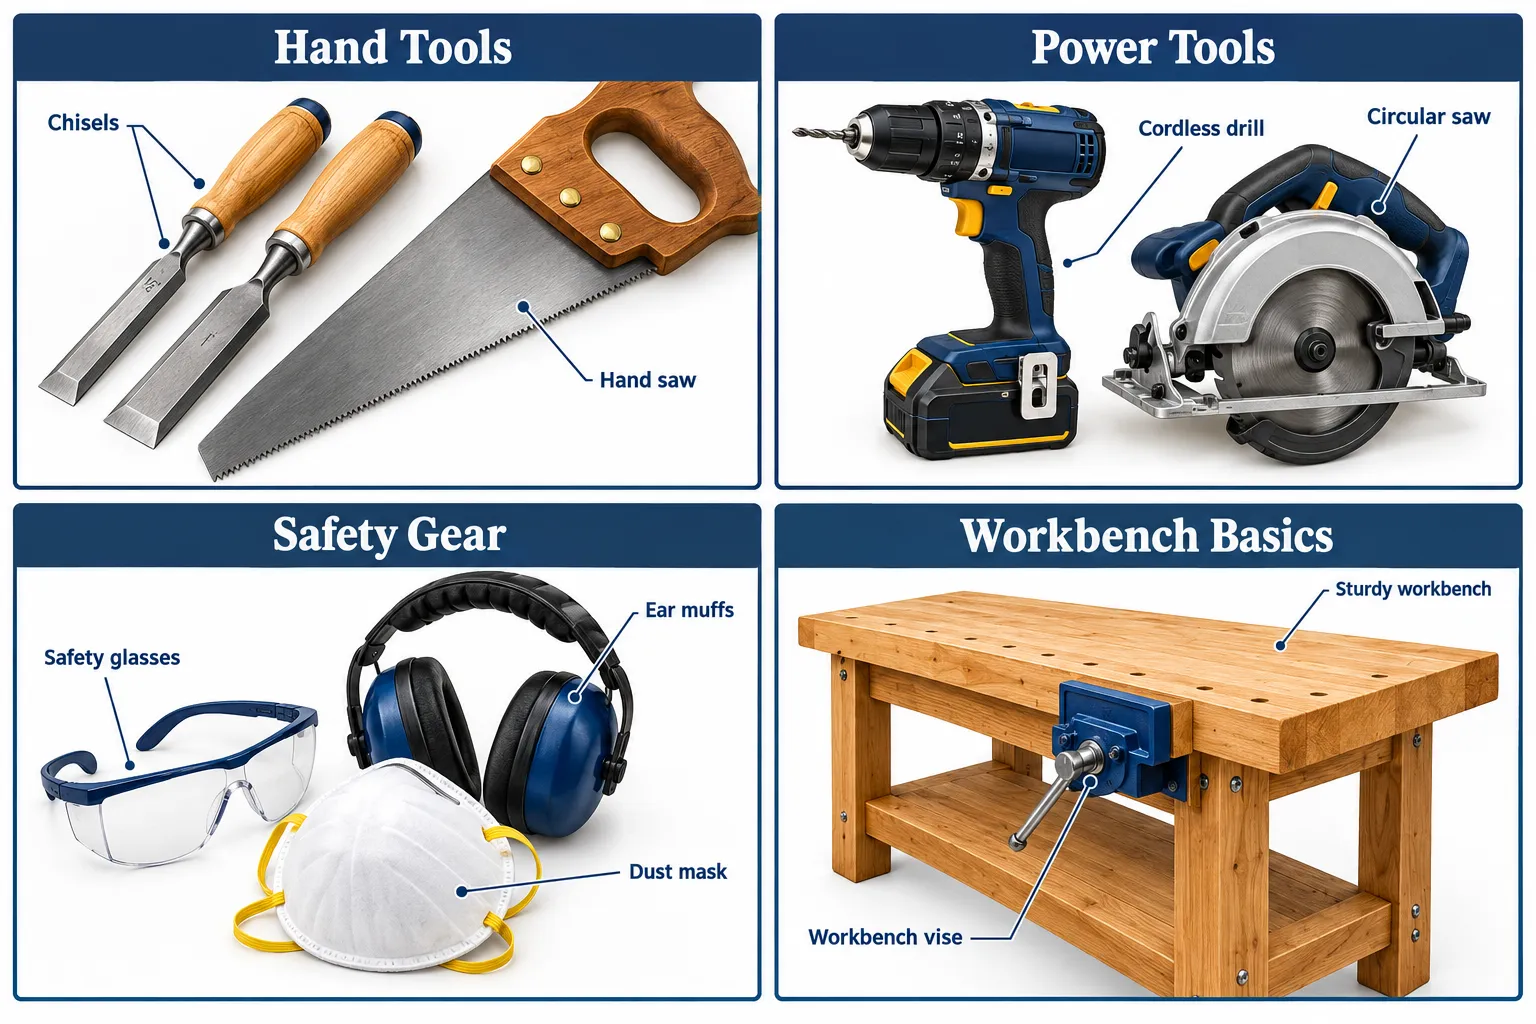
A sample starting budget:
- Hand tool kit (saw, chisels, clamps, square, plane): 150 to 300 dollars
- Safety gear (glasses, hearing protection, dust mask): 30 to 60 dollars
- One beginner power tool, such as a cordless drill or jigsaw: 80 to 150 dollars
- Wood stock for the first three to five projects: 50 to 100 dollars
- Finishing supplies (sandpaper, oil or poly, brushes): 30 to 50 dollars
Choose the lower end of this range if you’re testing whether woodworking is a hobby you’ll stick with. For a detailed breakdown of first-year spending, see how much a beginner should spend on tools in year one.
How much does it cost to build a basic workshop?
Beyond tools, setting up the physical workshop space itself typically costs 100 to 500 dollars if you’re converting an existing garage or room, and significantly more if you’re building a standalone shed. Costs cover shelving, lighting, basic electrical outlets, and a workbench.
Typical line items:
- A basic workbench (built or purchased): 50 to 200 dollars
- Wall shelving and pegboard storage: 40 to 100 dollars
- Improved lighting (shop lights or LED fixtures): 30 to 80 dollars
- Extension cords, power strips, or outlet upgrades: 20 to 60 dollars
If you’re building a dedicated outbuilding rather than converting existing space, costs rise quickly, and layout matters more. This guide to woodworking workshop shed plans covers layout and ventilation for standalone shops, and this workshop wiring guide explains how to add power safely if you’re starting from an unwired structure.
Is woodworking an expensive hobby to get into, and do I need expensive tools to start cheaply
Woodworking does not require an expensive start. A functional first kit can cost under 200 dollars if you buy hand tools only and work with inexpensive pine or poplar for early projects. Costs rise mainly when beginners buy power tools and machinery before they need them.
You can start cheap by:
- Buying a small set of quality hand tools rather than a large set of cheap ones
- Using affordable softwoods (pine, poplar) for practice before investing in hardwoods
- Borrowing or sharing power tools with a friend, neighbor, or local maker space before buying your own
- Choosing secondhand tools from estate sales or online marketplaces, especially for hand planes and chisels, which often improve with light restoration
A detailed cost comparison, including where beginners overspend, is covered in is woodworking expensive to start: real cost breakdown.
What safety equipment is essential for beginners?
Every beginner needs eye protection, hearing protection, and a dust mask or respirator before making a single cut. These three items prevent the most common and most serious woodworking injuries and health risks.
Essential safety gear:
- Safety glasses or a full face shield for any cutting or sanding
- Hearing protection (earmuffs or plugs) whenever using power tools
- A dust mask rated for fine particulates, or a respirator for finishing work with solvents
- Push sticks and featherboards once you move to power saws
- A first aid kit is kept in the workshop, not just in the house
Common mistake: skipping hearing protection because hand tools feel quiet. Repeated exposure to even moderate power tool noise over months adds up, so it’s worth building the habit early rather than only wearing protection for the loudest tools.
What’s the difference between a workbench and a table?
A workbench is built to hold wood steady during cutting, planing, and chiseling, while a table is built to hold objects at rest. Workbenches have features that tables lack, including a vise, dog holes for clamping, and a thick, flat top that resists movement and marring.
Key differences:
- A workbench top is typically thicker (1.5 to 3 inches) and made from dense hardwood or laminated layers to resist warping and absorb impact
- Workbenches include a vise and often bench dogs or holdfasts for securing material without clamps getting in the way
- A table’s legs and apron are often lighter and less rigid, since tables aren’t designed to absorb repeated hammering, chiseling, or sawing pressure
If you’re on a tight budget, a simple knockdown or folding workbench with a vise is a better early investment than a nice-looking table repurposed for woodwork, which will loosen and wobble under real use.
Best beginner woodworking projects to start with
The best first projects are small, use basic joinery, and require few tools. Cutting boards, simple boxes, floating shelves, and picture frames all teach measuring, cutting, and finishing without demanding a full shop.
A sensible project order:
- A simple cutting board or serving tray (teaches sanding and finishing)
- A small box with butt or rabbet joints (teaches basic joinery and glue-up)
- A floating wall shelf (teaches mounting and load considerations)
- A small table or stool with mortise-and-tenon or dowel joints (teaches structural joinery)
Example: a beginner who starts with a cutting board, then a small box, builds enough clamp and glue-up experience to attempt a simple side table within two or three months. For project ideas with step-by-step instructions, see this step-by-step guide to woodworking projects for beginners, and for joinery options as projects get more complex, this ultimate woodworking joints guide compares strength and difficulty across joint types.
How do I organize a small woodworking space?
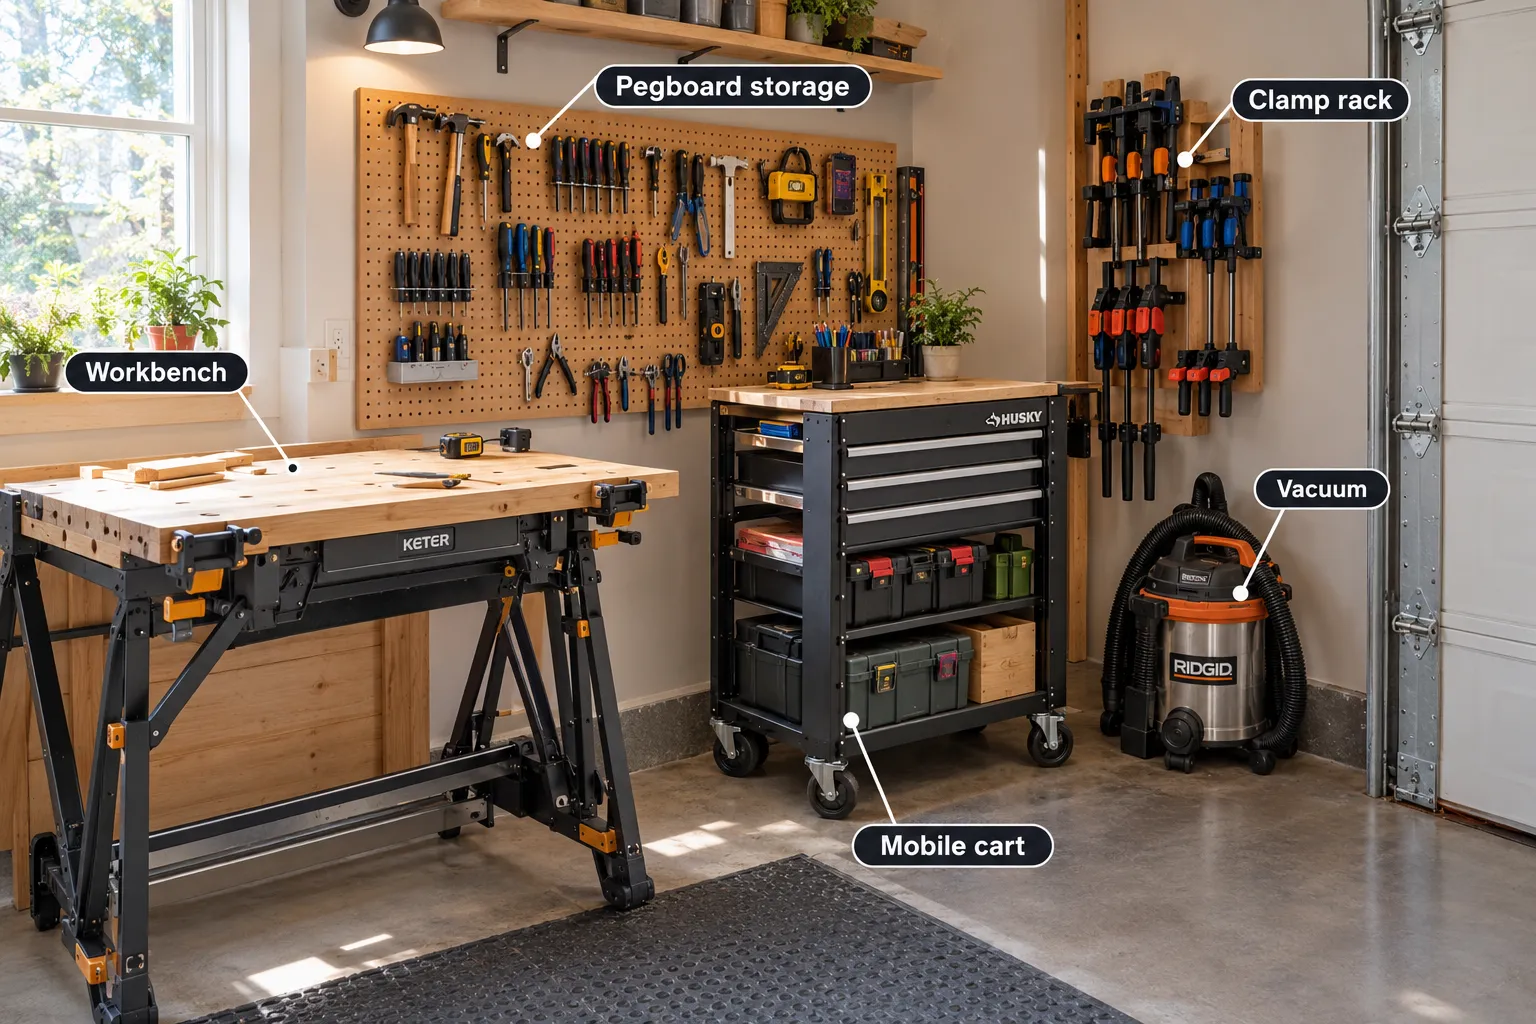
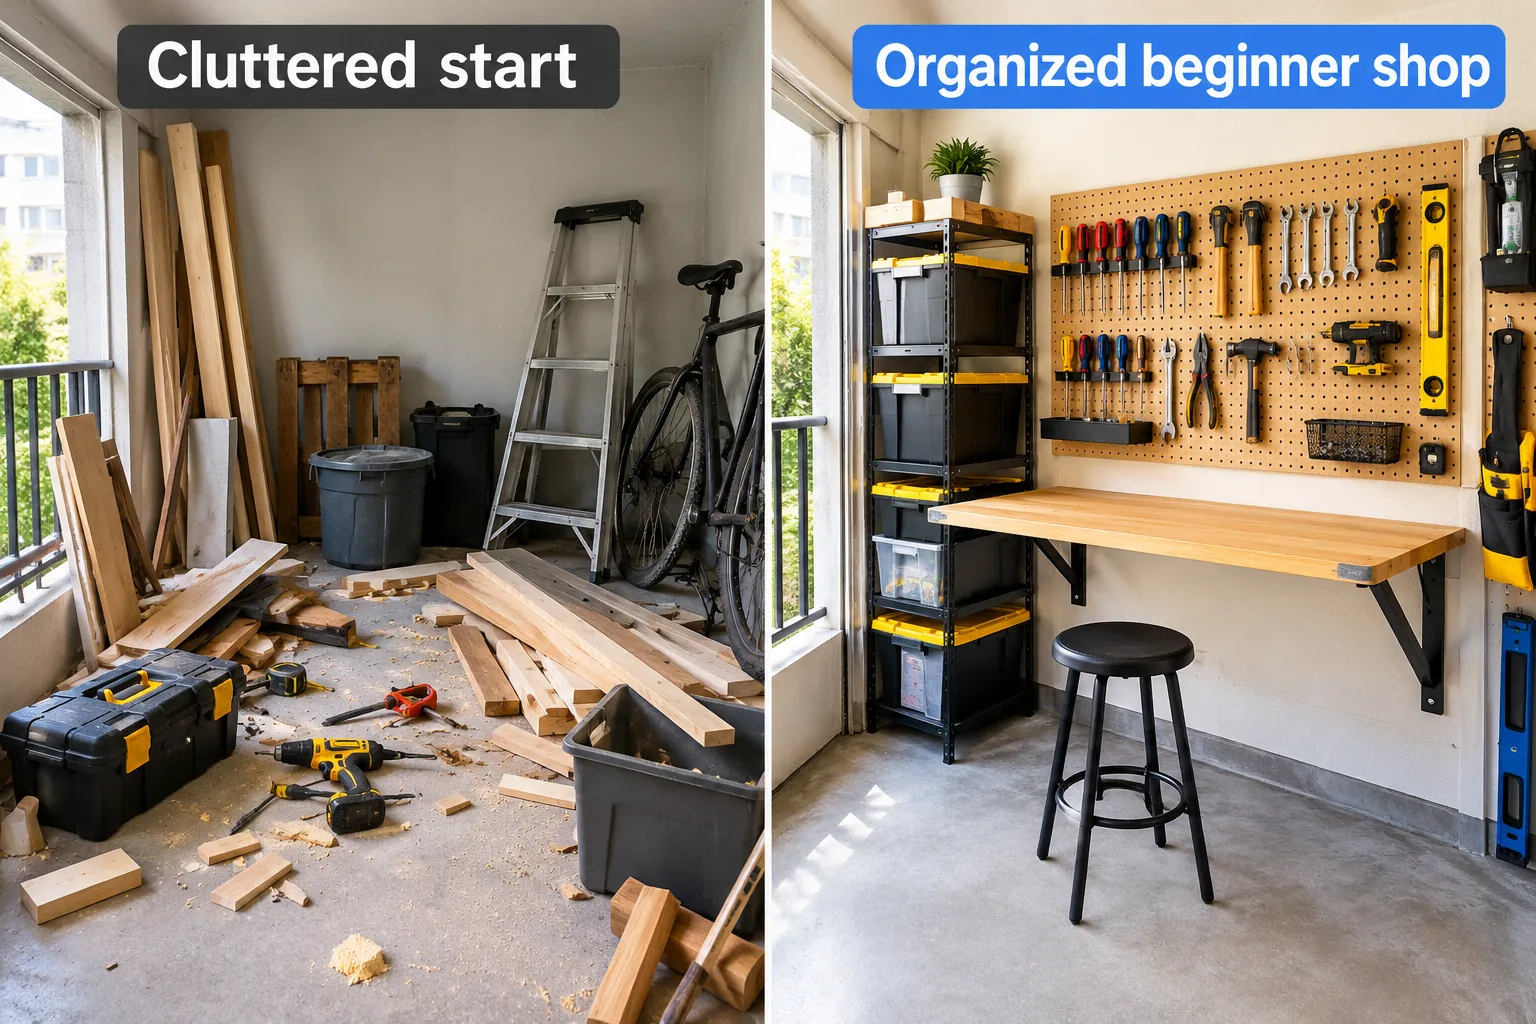
Organize a small shop vertically, not horizontally. Wall-mounted pegboards, stacked bins, and a mobile tool cart free up floor space for the one thing you can’t shrink: room to move around your workbench.
Practical organization steps:
- Mount a pegboard above or beside the workbench for hand tools you use often
- Store lumber vertically against a wall rather than flat, which frees significant floor area
- Use a rolling cart for power tools so the space can be converted quickly between project types
- Keep a small shop vacuum or dust collection bag nearby rather than sweeping sawdust into corners
Decision rule: if you can’t walk a full circle around your workbench, your storage is taking up working space, not spare space. Move it to the walls first.
Common mistakes beginners make in woodworking
The most common beginner mistakes are buying tools before needing them, skipping safety gear, rushing glue-ups, and ignoring wood movement. Each of these causes frustration or wasted material well before skill is the limiting factor.
Frequent mistakes to avoid:
- Buying a table saw or router before completing a hand-tool project
- Measuring once instead of twice, especially on expensive hardwood
- Gluing joints without a dry fit first
- Ignoring grain direction when planing or sanding, which tears the surface
- Storing lumber flat on a concrete floor, where moisture can cause warping
For a wider list of starter pitfalls and how to avoid them, the beginner woodworking guide to tools, projects, and tips covers additional mistakes tied to specific tools and techniques.
Can I teach myself woodworking, or do I need lessons
Most beginners can teach themselves woodworking using video tutorials, project plans, and practice, though formal classes speed up learning specific skills like joinery or sharpening. Self-teaching works well for anyone with patience and access to good reference material.
Ways to learn without a classroom:
- Follow structured online courses that build skills in order rather than jumping between unrelated videos
- Read and practice from detailed woodworking plans before freehanding a design
- Join a local woodworking club or makerspace for occasional hands-on feedback
- Start with simple joints and build complexity only after the basics feel comfortable
Choose a short in-person class if you’re struggling specifically with sharpening tools or using a table saw safely, since both benefit from direct feedback. For structured self-study, this guide to woodworking online training outlines course options, and this guide to reading and using woodworking plans helps translate plans into actual cut lists and steps.
FAQ: Beginner Woodworking Setup Guide
What essential tools should I buy first for woodworking as a beginner?
Start with a basic hand tool kit including tape measure, combination square, pencil, marking gauge, a good hand saw, a chisel set, clamps (at least four), wood glue, a block plane, several grits of sandpaper, and a cordless drill with basic bits. Avoid buying power tools until a project specifically requires them.
How much space do I need for a beginner woodworking workshop?
Aim for 80 to 150 square feet to accommodate a workbench (about 24 x 48 inches plus working clearance), material storage, and assembly space. Smaller spaces under 60 sq ft should focus on hand tools and foldable or wall-mounted benches to save room
Can I start woodworking in a small apartment or shared garage?
Yes, by sticking to quiet hand tools like planes, chisels, and hand saws and minimizing dust with good ventilation or working near windows. Use portable, folding benches and keep lumber stored vertically to maximize limited space.
What is a realistic budget to start woodworking for beginners?
Expect to spend between $200 and $600 for a hand tool kit, safety gear, and materials. If you want one or two basic power tools, plan for $600 to $1,500. Avoid buying expensive machines before mastering basic skills.
Do I need formal woodworking lessons, or can I teach myself?
Most beginners can teach themselves using online tutorials, project plans, and practice. However, short in-person classes are recommended for skills like tool sharpening or power saw safety to get hands-on feedback. Joining maker groups or clubs can also provide valuable support.
Conclusion
A solid beginner woodworking setup doesn’t require a large shop or a big budget. Start with a short list of hand tools, a safe and reasonably organized space, and one or two small projects that build real skill before you spend money on power tools or machinery. Add equipment only when a specific project calls for it, track what you actually use, and let your first few builds tell you where to invest next.
Next steps: pick one small project, such as a cutting board or simple box, gather only the tools listed earlier in this guide, and set a budget cap before you shop. Build that single project from start to finish before adding anything new to your cart.
Products, Tools, and Resources
A few starting points worth bookmarking as you build out your setup:
- A beginner woodworking tool kit curated for small projects and furniture, useful if you’d rather buy one bundle than piece together tools individually
- A hand tool woodworking kit guide with specific recommendations and cost ranges for your first chisels, saw, and plane
- A workshop layout and planning guide if you’re converting a garage, shed, or spare room into your main work area