
How to Wire a Workshop Shed for Power Tools Safely & Correctly

A poorly wired workshop shed is one of the leading causes of electrical fires in residential outbuildings, according to the National Fire Protection Association. Yet most hobbyist woodworkers set up their first shed with a single extension cord and call it a day. That works for a drill and a shop light, but the moment a table saw, dust collector, and thickness planer share the same circuit, something is going to trip, overheat, or worse.
This guide covers everything you need to know about how to wire a workshop shed for power tools safely and correctly, from choosing the right panel size to running wire underground, pulling permits, and avoiding the mistakes that cost people time and money.
Key Takeaways
- Most workshop sheds need a dedicated subpanel of at least 60 to 100 amps to run power tools reliably

- Heavy machinery like table saws and dust collectors often require 240V circuits, not standard 120V outlets
- Wire gauge matters: 12 AWG handles 20-amp circuits, 10 AWG handles 30-amp circuits, and 8 AWG handles 40-amp circuits
- Underground wire must be buried at least 12 inches deep in rigid conduit, or 24 inches deep if using direct-burial cable without conduit
- Permits are required in most jurisdictions for any new electrical subpanel or feeder circuit, skipping this step can affect your homeowner’s insurance
- A basic shed wiring project typically costs between $1,000 and $4,000 depending on distance from the house, panel size, and whether you hire an electrician
- GFCI protection is required for all outdoor and garage-type circuits under the National Electrical Code (NEC)
- Using a generator is a viable short-term alternative, but it comes with real limitations for sustained workshop use
Do You Need a Permit to Wire a Workshop Shed?
Yes, in most jurisdictions a permit is required any time you install a new electrical subpanel, run a feeder circuit from your home, or add new circuits to an outbuilding. Skipping the permit process is one of the most common mistakes homeowners make, and it can create serious problems, including voided homeowner’s insurance coverage and required removal of unpermitted work during a home sale.
Permit requirements vary by location, so contact your local building department before starting any work. Many municipalities allow homeowners to pull their own electrical permits for work on their own property, though some require a licensed electrician to sign off on the final inspection. The inspection process is actually your friend here: it confirms the work is safe before you plug in a $2,000 table saw.
What to expect when pulling a permit:
- Submit a basic wiring diagram showing the feeder route, panel location, and planned circuits
- Pay a permit fee (typically $50,$200 for residential electrical work, depending on the jurisdiction)
- Schedule a rough-in inspection before closing up walls
- Schedule a final inspection once everything is complete
What Size Electrical Panel Do You Need for a Workshop Shed?
For most hobbyist woodworking sheds, a 60-amp subpanel is the minimum practical starting point, and a 100-amp subpanel is a smarter long-term investment. The right size depends on how many tools you plan to run and whether any of them require 240V circuits.
To size a panel correctly, add up the amperage of every tool you expect to run simultaneously. A table saw draws 15 amps, a dust collector draws 12 amps, a shop light circuit draws 5 amps, and a few outlets for hand tools add another 10 amps. That’s already 42 amps of potential demand, before accounting for startup surge, which can be 2 to 3 times the running amperage on motor-driven tools.
Panel sizing guidelines for workshop sheds:
| Workshop Size / Use | Recommended Subpanel |
|---|---|
| Small shed, hand tools + 1-2 light power tools | 60 amps |
| Mid-size shed, table saw + dust collector | 100 amps |
| Full shop, multiple 240V machines | 100-200 amps |
A 100-amp subpanel gives room to grow. If you ever add a bandsaw, a jointer, or an air compressor, you won’t need to upgrade the panel again. For a deeper look at the kinds of tools that drive these electrical demands, see the guide to essential woodworking machinery for efficient woodwork.
Do You Need a Subpanel in Your Shed or Just Outlets?
If you’re running more than one or two circuits to the shed, a subpanel is the right approach. A subpanel allows each circuit to have its own breaker, which means better protection, easier troubleshooting, and the ability to add circuits later without rewiring the whole run.
Running a single 20-amp circuit directly from the house panel works if the shed is only used for a shop light and a single corded drill. But the moment you add a table saw or any 240V tool, a subpanel becomes necessary. It’s also a safer arrangement because it gives you a local disconnect, you can shut off power to the entire shed from inside it, which matters during a tool emergency or electrical fault.
Subpanel vs. direct circuit: when each makes sense
- Use a direct circuit if: the shed is less than 50 feet away, you only need one 20-amp outlet circuit and one light circuit, and you don’t anticipate adding more tools
- Use a subpanel if: you need multiple circuits, any 240V tools, or you want room to expand
How Many Circuits Do Power Tools Require?
Each major stationary power tool should have its own dedicated 20-amp or 30-amp circuit. Sharing circuits between large tools is a common beginner mistake that leads to nuisance tripping and, in worst cases, overheated wiring.
A practical workshop shed wiring plan typically includes:
- One 240V/30-amp circuit for the table saw
- One 240V/20-amp circuit for the dust collector
- One 240V/20-amp circuit for a thickness planer or jointer
- Two or three 120V/20-amp general-purpose outlet circuits
- One dedicated 120V/20-amp circuit for lighting
- One 120V/20-amp circuit for a small air compressor (or 240V if the compressor is large)
That’s six to seven circuits minimum for a well-equipped hobbyist shop. This is exactly why a 100-amp subpanel makes more sense than a 60-amp one for most woodworkers who plan to grow their tool collection over time. For a full overview of what tools a beginner shop typically needs, see beginner woodworking tools and equipment: what you need and why.
What’s the Difference Between 120V and 240V for Workshop Tools?
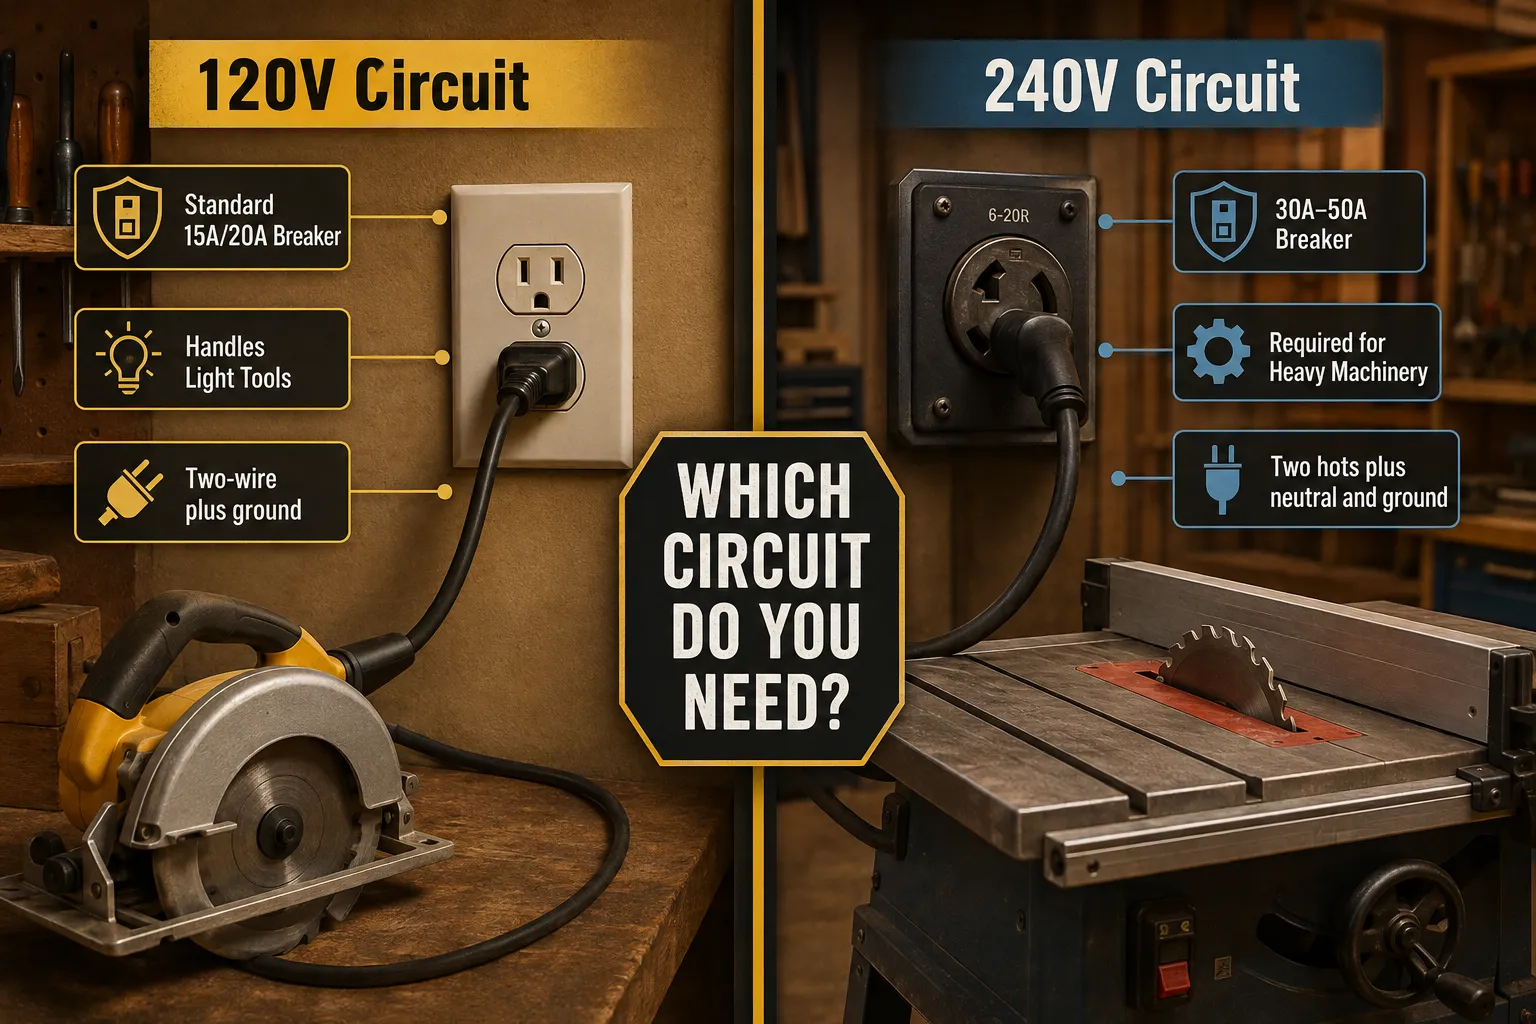
120V circuits power standard outlets and handle most portable and light-duty tools. 240V circuits deliver more power with less current draw, making them necessary for motors above about 1.5 horsepower. Most serious stationary woodworking machines, table saws, planers, jointers, and large dust collectors, run more efficiently and safely on 240V.
The practical difference comes down to motor performance and wire sizing. A 240V tool running at 15 amps delivers the same wattage as a 120V tool running at 30 amps. Because the 240V version draws half the current, it runs cooler, trips breakers less often, and puts less stress on the wiring. For any tool rated at 2 horsepower or more, 240V is almost always the better choice, and in many cases it’s required.
Can you run power tools off a regular outlet?
Yes, for smaller tools. A circular saw, jigsaw, router, or random-orbit sander all run fine on a standard 120V/20-amp circuit. The tools that genuinely need 240V are the stationary machines with large induction motors. Check the tool’s nameplate, if it lists “240V” or shows amperage above 15A at 120V, it needs a dedicated higher-voltage circuit.
What Gauge Wire Do You Need for Workshop Power?
Wire gauge is determined by the amperage of the circuit, not the voltage. Using undersized wire is one of the most dangerous mistakes in shed wiring because it can overheat inside walls without tripping the breaker.
Wire gauge reference for workshop circuits:
- 14 AWG: 15-amp circuits (general lighting, light-duty outlets)
- 12 AWG: 20-amp circuits (standard workshop outlets, small tools)
- 10 AWG: 30-amp circuits (most 240V workshop tools)
- 8 AWG: 40-amp circuits (large compressors, some planers)
- 6 AWG: 50-amp circuits (large shop equipment, subpanel feeders for small sheds)
For the feeder cable running from the house panel to the shed subpanel, size the wire to match the subpanel’s breaker. A 60-amp subpanel needs 6 AWG wire; a 100-amp subpanel needs 4 AWG or 2 AWG depending on the run length and whether aluminum or copper conductors are used.
How to Run Electrical Wire from House to Shed Safely
Running the feeder from your house to the shed is the most physically demanding part of the project. The two main methods are underground burial and overhead aerial runs, and each has specific code requirements.
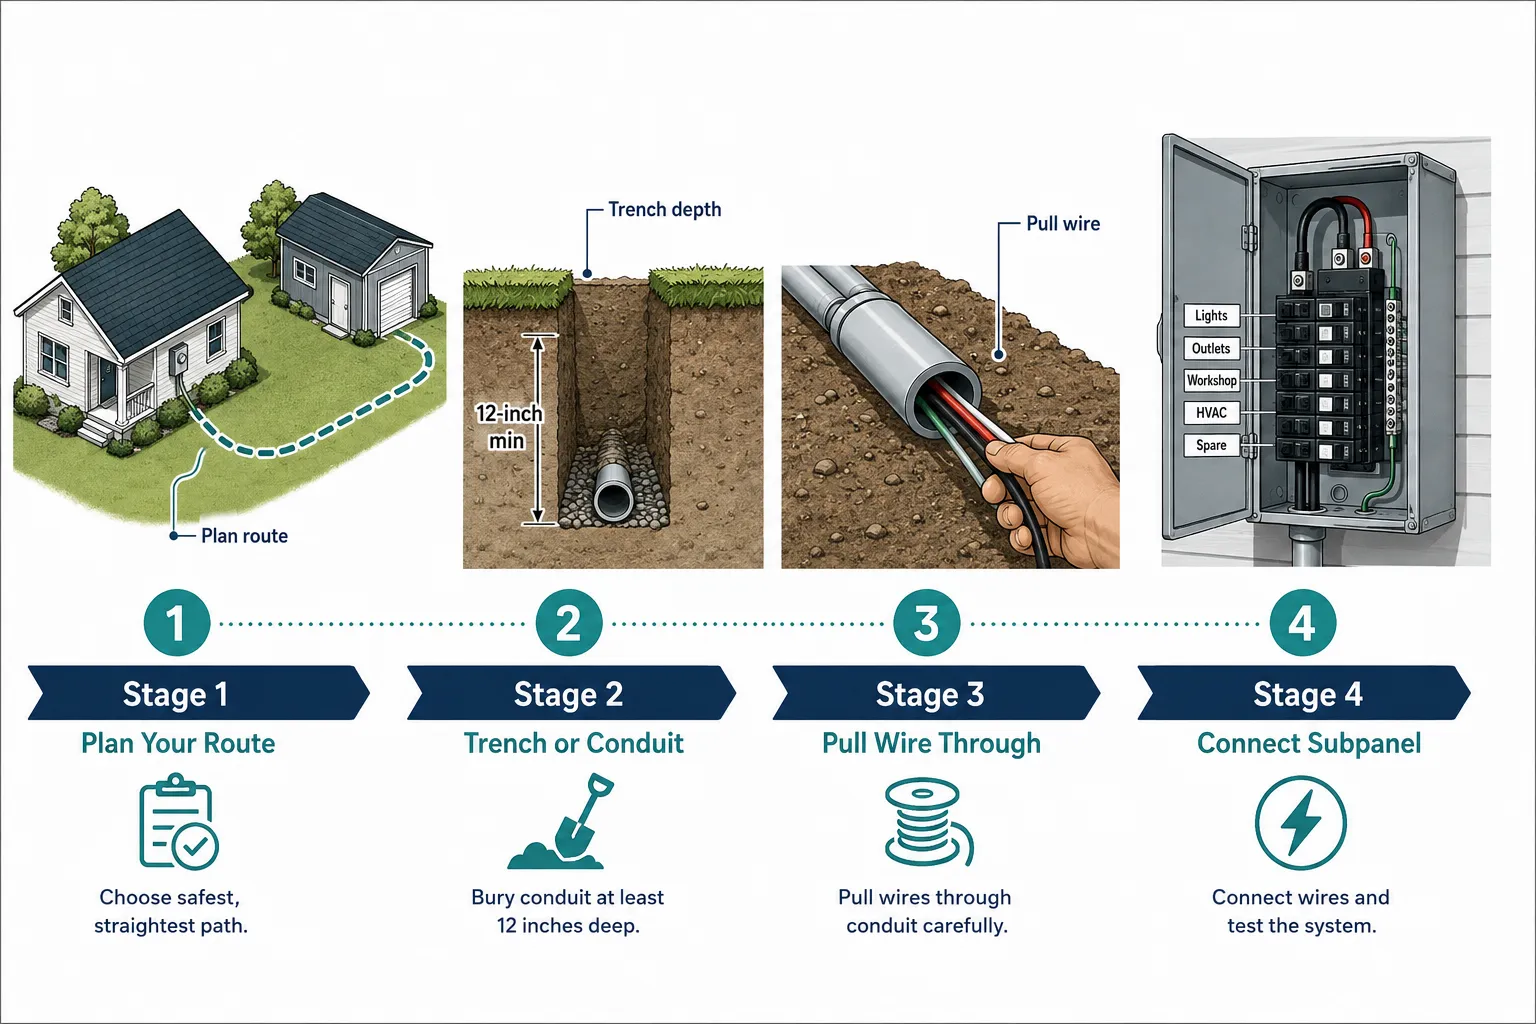
Underground burial (most common and recommended):
- Dig a trench from the house to the shed
- Burial depth: 24 inches for direct-burial cable (UF-B), or 12 inches for wire inside rigid metal conduit (RMC), or 18 inches for wire inside Schedule 40 PVC conduit
- Install a weatherproof conduit entry point at the house and shed
- Pull the feeder wire through the conduit
- Connect to the main panel at the house and to the subpanel in the shed
- Backfill the trench and mark the route
How far can you run electrical wire to a shed?
Distance affects voltage drop, which reduces the effective power delivered to tools. For runs under 100 feet, standard wire sizing works fine. For runs of 100 to 200 feet, step up one wire gauge to compensate for voltage drop. Beyond 200 feet, consult a voltage drop calculator or an electrician, because undersized wire over long runs can cause motors to run hot and underperform.
For overhead runs, the wire must clear at least 10 feet above ground in pedestrian areas and 12 feet above driveways. Overhead runs require weatherproof conduit or approved aerial cable and must be supported at both ends. Most homeowners prefer underground burial for a cleaner look and lower long-term maintenance.
If you’re still in the planning phase for the shed itself, the complete guide to building your own backyard shed covers the structural side of the project, including how to plan for electrical rough-in during the build.
Best Way to Protect Outdoor Electrical Wiring in a Shed
Inside the shed, all wiring should run through conduit or be protected in a way that prevents physical damage from tools, lumber, or accidental impact. Exposed Romex (NM-B cable) is not approved for use in garages or outbuildings where it can be damaged, this is a code requirement under NEC Article 334.
Recommended wiring methods inside a workshop shed:
- EMT (electrical metallic tubing): Affordable, easy to work with, provides excellent physical protection, and looks clean on framed walls
- PVC conduit: Good for damp areas or where corrosion is a concern
- Metal-clad cable (MC cable): Faster to install than conduit, provides built-in protection, and is code-compliant in most shed applications
All outlets in a workshop shed should be GFCI-protected, either through GFCI outlets or a GFCI breaker in the subpanel. This is required by the NEC for garage-type structures and is a genuine safety measure, sawdust, moisture, and power tools are a combination that makes ground faults a real risk.
Can You Use a Generator Instead of Wiring the Shed?
A generator is a workable short-term solution, especially if the shed is far from the house or if the project budget is tight right now. For occasional use with one or two tools, a 3,500 to 5,000-watt generator can handle a table saw and a shop light without issue.
The limitations become clear quickly, though. Generators require fuel, produce exhaust (meaning the shed needs ventilation or the generator must run outside), create noise, and can’t run 240V tools unless specifically configured as a dual-voltage unit. For a serious workshop used regularly, permanent wiring is almost always the better investment within a year or two of regular use.
Generator makes sense if:
- The shed is temporary or will be relocated
- Budget doesn’t allow for full wiring right now
- The shed is used only a few times per month
Permanent wiring makes sense if:
- The shed is a fixed structure used weekly or more
- Any 240V tools are planned
- Convenience and safety are priorities
How Much Does It Cost to Wire a Workshop Shed?
The total cost to wire a workshop shed for power tools typically ranges from $1,000 to $4,000 for most residential projects, based on industry estimates from electrical contractors in 2026. The wide range reflects differences in distance from the house, panel size, local labor rates, and whether the homeowner does any of the work themselves.
Approximate cost breakdown:
- Subpanel (60-100 amp) and breakers: $150,$400 in materials
- Feeder wire (per 100 feet, 4 AWG copper): $150,$250
- Trenching (if hiring out): $300,$800 depending on distance and soil
- Conduit and fittings: $100,$300
- Outlets, boxes, GFCI devices: $100,$250
- Electrician labor (if hired): $500,$1,500 depending on scope
Doing the trench work yourself and hiring an electrician only for the panel connections and final inspection is a common approach that keeps costs reasonable while ensuring the most critical work is done correctly. For a broader look at shed construction costs, see how much does it cost to build a small shed.
Common Mistakes People Make Wiring Workshop Sheds
Even experienced DIYers make these errors. Knowing them in advance saves real money and frustration.
- Undersizing the panel. Installing a 60-amp panel to save money, then needing to upgrade it two years later when adding a second 240V tool, costs more in the long run than starting with 100 amps.
- Using NM-B (Romex) inside the shed. Standard residential cable is not approved for exposed use in outbuildings. Use conduit or MC cable.
- Skipping the permit. Unpermitted electrical work can void insurance claims and create problems when selling the home.
- Not accounting for voltage drop on long runs. Wire sized correctly for amperage may still be undersized for a 150-foot run.
- Sharing circuits between large tools. A table saw and a dust collector on the same 20-amp circuit will trip the breaker every time both motors start simultaneously.
- Forgetting GFCI protection. All workshop shed outlets need GFCI protection, it’s not optional under current NEC standards.
- No local disconnect. The subpanel itself serves as the local disconnect, but only if it’s accessible and properly labeled. Don’t mount it behind a shelf or in a hard-to-reach corner.
What Safety Equipment Do You Need for Workshop Shed Electrical?
Beyond the wiring itself, a properly set up workshop shed includes several layers of electrical safety equipment that protect both the tools and the person using them.
- GFCI outlets or breakers on every circuit, non-negotiable in a workshop environment
- Arc fault circuit interrupter (AFCI) breakers where required by local code (check with your inspector)
- Weatherproof outlet covers on any outlets near windows, doors, or areas exposed to moisture
- Proper labeling on every breaker in the subpanel so circuits can be identified and shut off quickly
- Smoke detector rated for garage/outbuilding use, installed near the entrance
- Fire extinguisher rated for electrical fires (Class C or ABC), mounted near the exit
These aren’t just code requirements, they’re the difference between a close call and a serious incident in a space full of combustible wood dust and spinning blades. For a broader look at setting up a safe and functional shop, the beginner woodworking guide: tools, projects, and tips to start today is a solid next step.
Frequently Asked Questions
Can I wire my own shed without an electrician?
In most jurisdictions, homeowners can perform their own electrical work on their own property with a permit. The permit and inspection process ensures the work meets code. Some areas require a licensed electrician for service entrance work or subpanel installation, check with your local building department first.
How deep does electrical wire need to be buried going to a shed?
Direct-burial cable (UF-B) must be buried at least 24 inches deep. Wire inside Schedule 40 PVC conduit requires 18 inches. Wire inside rigid metal conduit (RMC) requires only 12 inches. These are NEC minimums, local codes may require more.
What type of wire do I use for underground runs to a shed?
Use UF-B (underground feeder) cable for direct burial, or THWN/THHN wire pulled through watertight conduit. Standard NM-B (Romex) is not rated for underground or outdoor use.
Do I need 240V for a table saw?
Many contractor-style table saws run on 120V, but cabinet saws and most professional-grade saws require 240V. Check the nameplate on your specific saw. If it lists both voltages, the 240V connection will give better performance and lower amp draw.
How many outlets should a workshop shed have?
Plan for more than you think you need. A practical minimum is 8 to 10 outlets spread across 2 to 3 circuits, plus dedicated outlets for each major stationary tool. Outlets should be placed at bench height on multiple walls so cords don’t have to cross the floor.
Can I use aluminum wire for the feeder to my shed subpanel?
Yes, aluminum wire is code-compliant and commonly used for feeder runs because it costs significantly less than copper at larger gauges. Use aluminum-rated connectors and anti-oxidant compound on all connections. Size up one gauge compared to copper (for example, 2 AWG aluminum instead of 4 AWG copper for a 100-amp feeder).
What’s the minimum shed size that justifies a subpanel?
Size doesn’t determine the need, tool count and circuit count do. Even a small 10×12 shed used as a woodworking shop benefits from a subpanel if it will have more than two circuits.
Do shed outlets need to be on GFCI circuits?
Yes. Under the NEC, all outlets in garages and outbuildings must be GFCI-protected. This applies to workshop sheds regardless of whether they’re attached or detached from the house.
How long does it take to wire a workshop shed?
A licensed electrician can complete a straightforward shed wiring project in one to two days. A DIY project with permit inspections typically takes a weekend for the physical work, plus scheduling time for inspections.
What happens if I overload a circuit in my shed?
The circuit breaker trips, cutting power to that circuit. This is the breaker doing its job. Repeated tripping means the circuit is undersized for the load, the solution is a dedicated circuit for the tool causing the overload, not a larger breaker on the existing circuit.
Conclusion
Wiring a workshop shed for power tools is one of the most valuable investments a hobbyist woodworker can make. Done correctly, it transforms a basic outbuilding into a safe, capable, and genuinely enjoyable place to work. Done poorly, it creates fire hazards, nuisance tripping, and expensive rework.
The core principles are straightforward: size the panel for future growth, give heavy tools their own dedicated circuits, bury wire at the right depth, protect everything with GFCI breakers, and pull the permit. These steps aren’t bureaucratic obstacles, they’re the framework that makes the whole system reliable for years of use.
Actionable next steps:
- List every tool you own or plan to buy, along with its voltage and amperage requirements
- Sketch a rough floor plan of the shed showing where tools and outlets will go
- Calculate the total amperage demand and choose a subpanel size with 25% headroom
- Contact your local building department to understand permit requirements before purchasing materials
- Get two or three quotes from licensed electricians if any part of the project is outside your comfort level
Products, Tools, and Resources
Getting the wiring right starts with understanding the tools that will be drawing power from it. The various tools used for woodworking guide is a useful reference for matching tool specs to circuit requirements before finalizing the electrical plan.
For the shed structure itself, the DIY shed building cost comparison: hire help vs. go solo covers how to think about where to spend versus where to save on the overall project.
Once the shop is wired and running, the essential woodworking machinery for efficient woodwork guide helps with choosing the stationary machines worth dedicating those new 240V circuits to.
Recommended materials for shed wiring:
- 100-amp subpanel with main breaker (Square D Homeline or Leviton are widely trusted brands)
- 4 AWG aluminum SER cable for feeder runs up to 100 feet
- Schedule 40 PVC conduit for underground runs (gray for underground, white for above-ground)
- GFCI breakers for the subpanel (rather than individual GFCI outlets, covers the whole circuit)
- EMT conduit and fittings for interior wiring runs
- Weatherproof outlet boxes and in-use covers for any exterior-facing outlets
Every one of these materials is available at major home improvement retailers. Buying in bulk for the conduit and wire runs is almost always cheaper than buying in smaller lengths, so measure twice before heading to the store.