
Best Joinery for Table Legs That Won’t Loosen Over Time
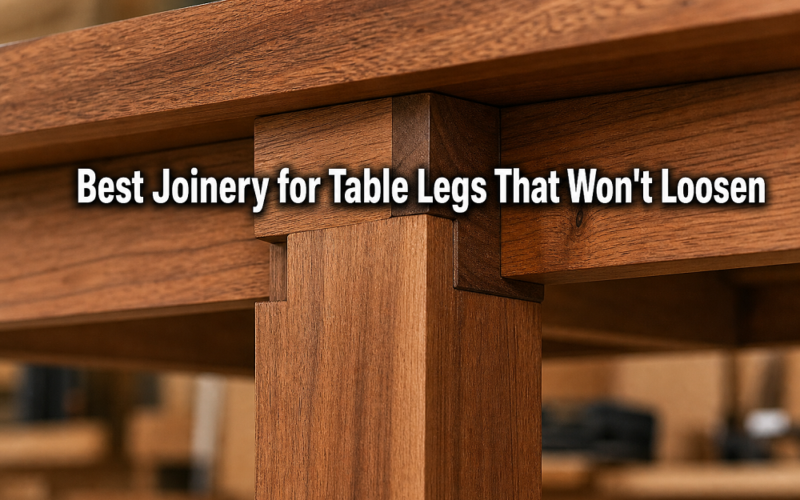
The best joinery for table legs is mortise and tenon, reinforced with corner blocks. This combination resists the lateral racking force that causes wobble better than any other method available to home woodworkers. If you’re a beginner or working on a faster build, pocket holes paired with corner blocks are a strong, practical alternative.
The leg-to-apron joint fails because it absorbs lateral stress, not just vertical load. Every time someone leans on the table edge, pushes back a chair, or bumps a leg, that joint is being racked sideways. A glue-only connection has no mechanical resistance to this kind of force. The glue bond is stressed repeatedly at an angle it wasn’t designed to handle, and over months or years, it gradually lets go.
The real culprit, though, is wood movement. Wood expands and contracts with seasonal humidity changes, and that constant dimensional cycling works against a rigid glue bond. The joint doesn’t fail all at once. It loosens by degrees, almost imperceptibly, until one day the table rocks and the fix is no longer simple.
This is why choosing the right joinery matters from the start. A stronger glue won’t solve the problem. Structural reinforcement will.
There are five main joinery methods used for table leg-to-apron connections, each with a different skill level, strength profile, and best-use case.
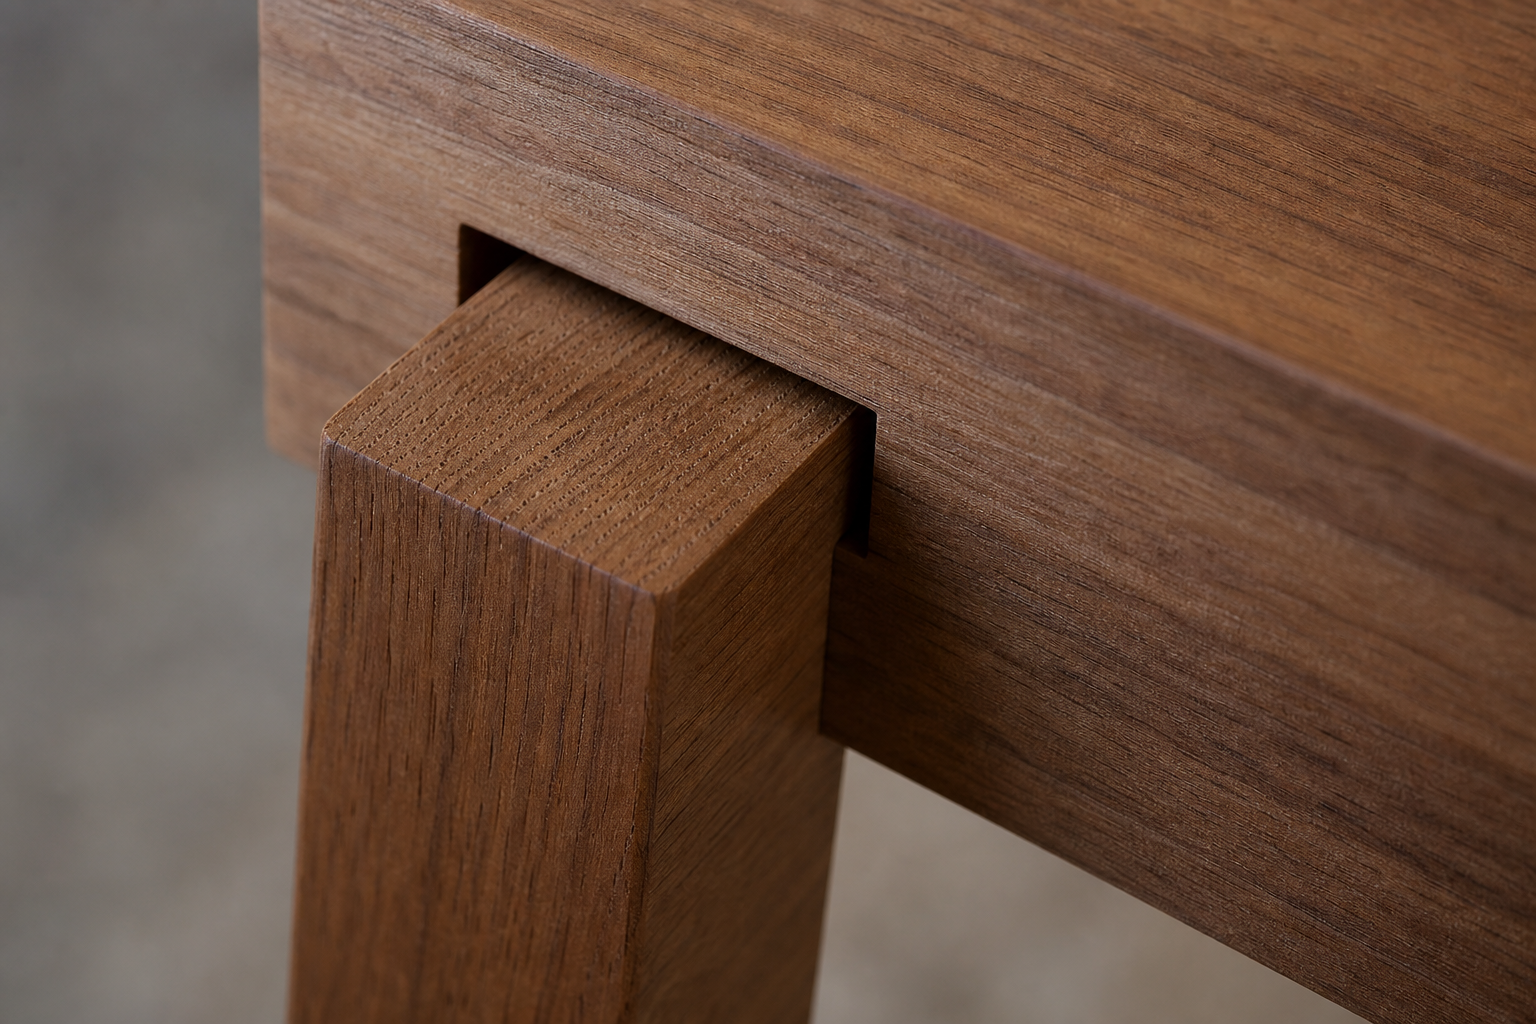
Mortise and Tenon: A rectangular tenon cut on the end of the apron fits into a matching mortise cut into the leg. This is the strongest standard method and the one most traditional furniture relies on.
Dowel Joinery: Wooden dowels align and connect the apron to the leg. Easier to cut than mortise and tenon, but less resistant to racking force because the dowels rely more heavily on glue surface area than on mechanical shoulder contact.
Pocket Hole Joinery: Angled screws driven through the apron into the leg. Fast and beginner-friendly, but needs reinforcement at the leg-to-apron connection to handle lateral stress over time.
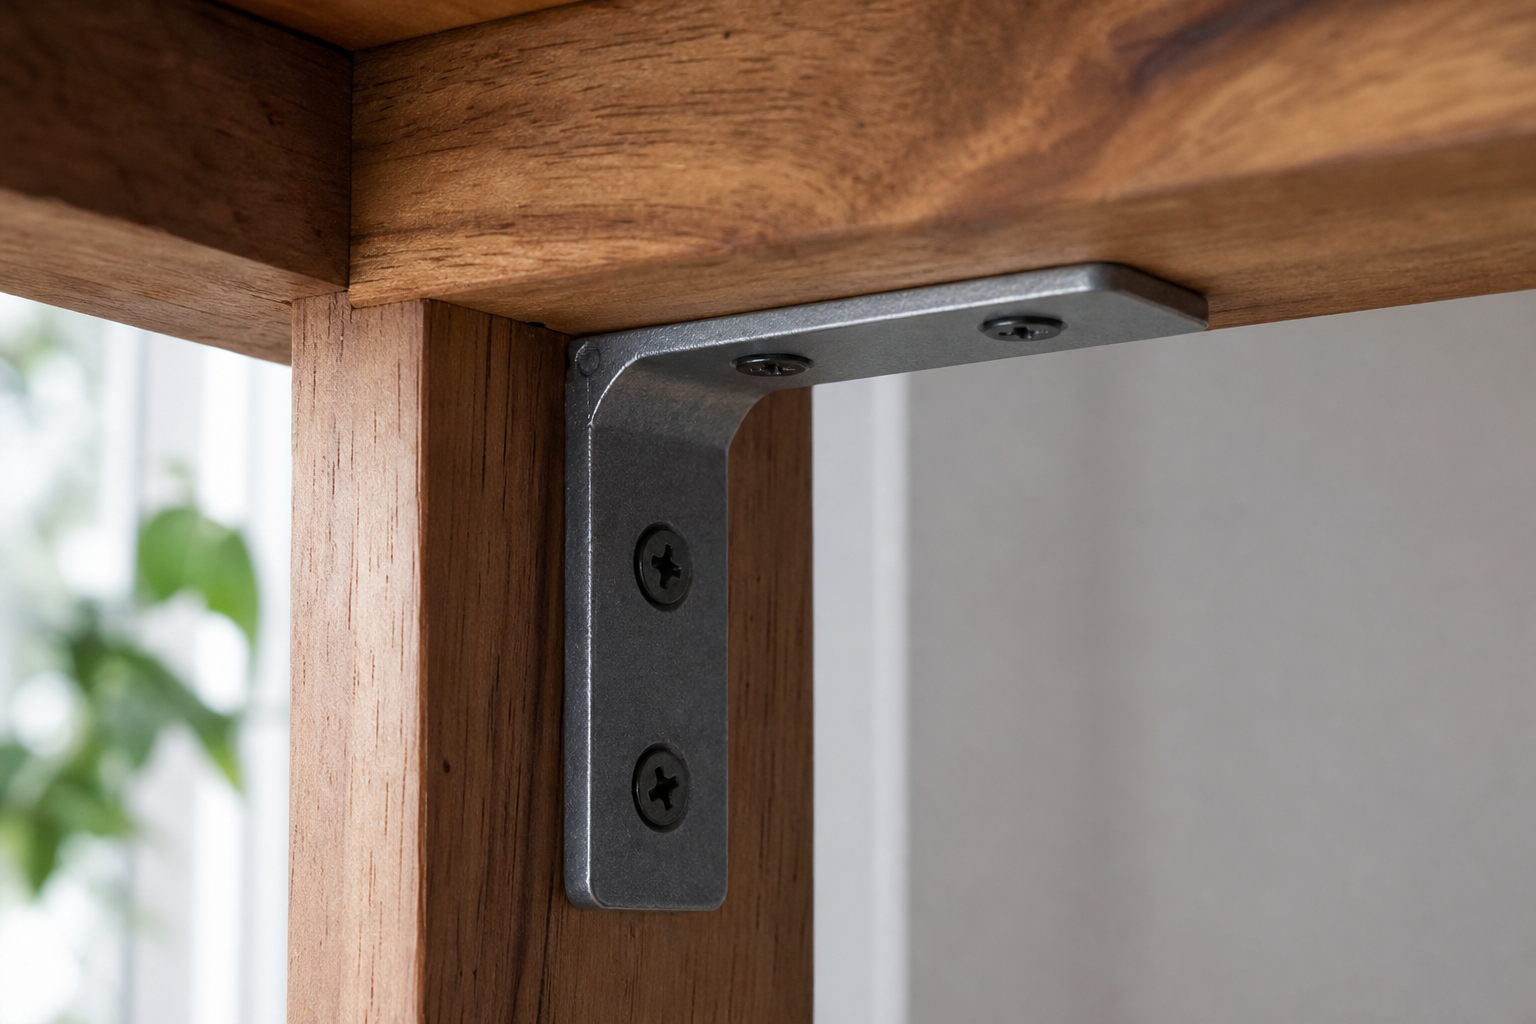
Corner Blocks: Triangular wood blocks or metal brackets glued and screwed into the inside corner where leg meets apron. Often used as a reinforcement layer on top of another method, but effective as a primary method for simpler builds.
Hardware Leg Connectors: Hanger bolts, threaded inserts, and metal leg plates that create a mechanical, re-tightenable connection. Best for knock-down furniture or pieces that need to be moved frequently.
Each method has a place. The question is matching the right one to your build, your skill level, and how long you want the table to last. For a deeper look at joinery techniques across furniture types, the woodworking joinery and techniques guide covers the broader landscape well.
Mortise and tenon is stronger than dowel joinery for table legs, specifically because of how each method handles racking force. In a mortise and tenon joint, the tenon’s shoulders bear directly against the walls of the mortise when the joint is stressed sideways. That mechanical shoulder contact resists lateral movement without relying on glue alone.
Dowel joints don’t have that shoulder contact. The dowels sit in holes drilled into both pieces, and the connection depends largely on glue bonding to the dowel surface and the surrounding wood. When the joint is racked sideways, the dowels are being asked to resist shear force through glue adhesion rather than mechanical bearing. That’s a meaningful difference over years of use.
Dowel joinery is not a bad choice for table legs. It’s a genuine step up from glue-only construction, and it’s easier to execute than mortise and tenon for beginners. But if you’re building a table you want to last decades, mortise and tenon is the better investment of time.
Choose dowel joinery if: You need a faster build, you’re still developing your mortise and tenon skills, and you plan to reinforce the connection with corner blocks.
Choose mortise and tenon if: You want the strongest possible joint, you’re building a heavy-use dining table, or you’re building a piece intended to last a generation or more.
Mortise and tenon joints are widely regarded by furniture makers and woodworking engineers as the strongest standard option for leg-to-apron connections, but specific strength comparisons depend heavily on wood species, tenon dimensions, fit quality, and whether glue is used. A loose-fitting tenon with gaps can actually perform worse than a well-executed dowel joint.
What the research and professional consensus consistently support is this: a properly fitted mortise and tenon joint with glue resists racking force better than dowels, pocket holes, or hardware connectors alone, because the mechanical shoulder contact distributes stress across a larger bearing surface. The joint doesn’t depend on a single point of failure.
A reasonable working estimate, based on woodworking engineering literature and furniture testing methodology, is that a glued mortise and tenon joint can resist racking loads several times greater than a glued butt joint of the same dimensions. The exact multiplier varies by species and fit, so treat that as directional rather than a precise figure.
The practical takeaway: fit quality matters as much as method. A sloppy mortise and tenon joint won’t outperform a tight dowel joint. Invest time in getting a snug fit, and the strength advantage becomes real.
For heavy-duty dining tables, including large tables that seat six or more people and tables that will see daily use for years, mortise and tenon joinery reinforced with corner blocks is the minimum recommended standard. This combination handles both the vertical load of the tabletop and contents and the lateral racking stress from people leaning, pushing, and sitting against the edge.
The apron depth matters here too. A deeper apron (typically 3.5 to 4.5 inches for a dining table) gives you more tenon length and more glue surface area, which translates directly to a stronger joint. Shallow aprons with short tenons are a common weak point in otherwise well-built tables.
For very large tables (96 inches or longer), consider adding a center stretcher between the long apron rails, or a lower shelf stretcher connecting the legs. These elements triangulate the structure and dramatically reduce the racking stress that reaches the leg joints in the first place.
What to avoid on heavy-duty builds:
If you’re sourcing plans for a dining table build, the furniture building plans library includes options with full cut lists and joinery specifications.
Pocket holes work for table legs, but they should not be your only joinery method at the leg-to-apron connection. Pocket hole screws are strong in tension and shear along the screw axis, but a table leg joint is repeatedly stressed laterally, and pocket holes have limited resistance to that kind of racking force on their own.
The fix is straightforward: pair pocket holes with corner blocks. Add triangular wood blocks or metal corner brackets glued and screwed into the inside corner of each leg-to-apron joint, and you get a build that’s both fast to assemble and structurally reinforced against the failure mode that causes wobble.
This combination is genuinely appropriate for many furniture applications, including side tables, coffee tables, and lighter dining tables. It’s also the most beginner-accessible approach that still produces a durable result.
Pocket holes work well when:
Pocket holes are not enough when:
For beginners getting started with furniture builds, the beginner woodworking section has a useful overview of skill progression and project selection.
Reinforcing table leg joints is one of the highest-value things you can do on any table build, whether you’re starting fresh or fixing an existing piece. The goal is adding mechanical resistance to the lateral racking force that causes wobble over time.
Corner blocks (most effective, easiest to add): Metal corner brackets: Stretchers: Re-gluing loose joints: Professional furniture makers and custom woodworkers overwhelmingly use mortise and tenon joinery for table legs, often combined with corner blocks or wooden buttons for the tabletop attachment. This has been the standard in furniture making for centuries, and it remains the standard because it works.
In production furniture (mid-range and above), mortise and tenon joints are often cut with a dedicated mortiser or router jig rather than by hand, which makes them faster to produce at scale while maintaining the fit quality that makes them strong. Some makers use loose tenons (also called floating tenons, cut with a Festool Domino or similar tool) as a faster alternative to traditional integral tenons. Loose tenon joinery is genuinely strong and widely respected among professional makers.
Budget production furniture often uses dowels or cam-lock hardware connectors, which are faster and cheaper to manufacture but less durable under long-term lateral stress. This is one reason why flat-pack furniture tends to loosen faster than solid wood furniture built with traditional joinery.
If you’re interested in the tools professional makers use for these joints, the woodworking tools and equipment guide covers mortisers, router jigs, and Domino-style loose tenon tools in detail.
Dowel joinery is good enough for many table leg applications, but it has limitations that matter for heavy-use tables. Dowels improve on a glue-only joint by adding alignment and increasing glue surface area, but they don’t provide the mechanical shoulder contact that makes mortise and tenon so resistant to racking.
For a side table, a console table, or a coffee table that won’t see heavy daily stress, well-executed dowel joinery with corner blocks is a reasonable choice. For a dining table that will be used every day by multiple people, the lack of shoulder contact in a dowel joint is a genuine weakness worth addressing with a stronger method.
Key factors that affect dowel joint performance:
If you choose dowel joinery, use fluted or spiral-grooved dowels rather than smooth ones. The grooves allow glue to distribute more evenly along the dowel length, which improves bond strength meaningfully.
Mortise and tenon is the better choice for table legs compared to box joints. Box joints (also called finger joints) are excellent for corner connections in boxes, drawers, and carcass work, where the joint is loaded in tension and the large glue surface area is the primary strength mechanism. They are not well-suited to the leg-to-apron connection on a table.
The leg-to-apron joint needs to resist lateral racking force, and a box joint at this location doesn’t provide the mechanical shoulder contact or the geometry to do that effectively. Mortise and tenon is specifically designed for this type of T-shaped connection under lateral load.
Use mortise and tenon for: Table leg-to-apron connections, chair leg connections, frame-and-panel construction.
Use box joints for: Box corners, drawer construction, small carcass work where the joint is loaded in tension rather than lateral shear.
Table joints give clear warning signs before they fail completely. Catching them early makes the repair much simpler.
Early warning signs:
Signs of more advanced failure:
If you catch it at the early-warning stage, adding corner blocks to the inside of the joints is often enough to stabilize the table without disassembly. If the joint has progressed to visible movement or cracked wood, a proper repair requires disassembly, cleaning, re-gluing, and adding mechanical reinforcement before reassembly.
Fixing a loose table leg joint is straightforward if you address it before the joint fails completely. The method depends on how far the joint has deteriorated.
For early looseness (no visible gap, just slight movement):
For more advanced looseness (visible gap or movement):
Hide glue is worth considering for repairs on older furniture because it bonds well to surfaces that may have residual hide glue from the original build, and it’s reversible if future repairs are needed.
The joinery method differs slightly depending on leg profile, but the structural principles are the same for both round and square table legs.
Square table legs are the standard for mortise and tenon joinery. The flat faces of a square leg give you a natural reference surface for laying out and cutting the mortise, and the apron connects flush to the leg face. This is the most straightforward setup for any of the joinery methods described here.
Round table legs (tapered or turned) require a slightly different approach. A true mortise and tenon is still possible, but the mortise must be cut before the leg is turned, or the leg must be left with a flat section at the apron connection point. Many makers use this approach: turn the decorative sections of the leg but leave a square section at the top where the aprons connect, then cut mortises into that square section normally.
For round legs where cutting a mortise isn’t practical, hardware leg connectors (hanger bolts with a threaded plate) are a common and effective alternative. They provide a mechanical connection that can be re-tightened if needed, and they work well with the geometry of a round leg.
Dowel joinery is also commonly used with round legs, particularly on chair construction. It’s accessible and reasonably strong when executed well, though corner blocks are harder to add to a round leg assembly.
Yes, in almost every case. A dry-fit mortise and tenon joint (no glue) relies entirely on the mechanical fit of the tenon in the mortise, and even a tight fit will loosen over time as wood moves seasonally. Adding glue to a well-fitted mortise and tenon joint creates a bond that is significantly stronger than either the mechanical fit or the glue alone, because the two mechanisms work together.
The exception is draw-bore joinery, where a wooden peg is driven through a slightly offset hole in the tenon and mortise to mechanically lock the joint. This technique was historically used without glue and is still effective, but it requires precise execution and is more advanced than standard glued mortise and tenon.
Best glue choices for mortise and tenon joints:
Apply glue to both the tenon faces and the mortise walls, not just one surface. Clamp firmly and allow full cure before stressing the joint.
For beginners, the best joinery for a first table build is pocket holes reinforced with corner blocks. This combination is accessible with basic tools, produces a structurally sound result, and teaches the fundamentals of the leg-to-apron connection without requiring the precision skills that mortise and tenon demands.
A Kreg jig (or equivalent pocket hole jig) is the primary tool needed, along with a drill, clamps, and a square. The corner blocks can be cut from scrap wood with a miter saw or even a handsaw. The total skill barrier is low, and the structural result is genuinely good for most table applications.
As your skills develop, mortise and tenon joinery is the natural next step. It requires a router with a straight bit (or a dedicated mortiser), careful layout, and patience to fit the joint properly. But the payoff is a joint that will outlast almost anything else in the shop.
Beginner progression for table joinery:
For project ideas that match your current skill level, the woodworking projects page has a range of builds organized by difficulty. And if you’re still getting your shop set up, the tools used for woodworking guide covers what you actually need to get started without overbuying.
A properly cut mortise and tenon joint is the strongest standard option for table leg-to-apron connections. The tenon’s shoulders bear directly against the mortise walls under lateral stress, distributing racking force across a large mechanical bearing surface rather than relying on glue adhesion alone. This is why furniture built with this joint generations ago is often still solid today.
The tradeoff is skill and time. Cutting clean, tight-fitting mortises and tenons on four legs takes more practice than any other method here. The mortise needs to be square, the tenon needs to fit snugly (not so tight it requires a mallet to seat, not so loose it rocks), and the shoulders need to be flat and square so they bear evenly against the leg face.
Standard dimensions for a dining table mortise and tenon:
These are starting points, not rules. Adjust based on your wood species, apron dimensions, and the specific demands of your build.
Corner blocks are the single most effective upgrade you can make to any table build, regardless of which primary joinery method you use. A triangular block of wood glued and screwed into the inside corner of each leg-to-apron joint adds direct mechanical resistance to the racking force that causes wobble, for minimal cost and about 15 minutes of work per joint.
They work well as the primary joinery method on simpler builds (paired with pocket holes or dowels), and they work equally well as a reinforcement layer on top of mortise and tenon joints. There is almost no scenario where adding corner blocks makes a table worse.
For a first table build, corner blocks are the single highest-value addition you can make. Cut them from scrap hardwood if possible (oak, maple, or poplar all work well), size them at roughly 3 to 4 inches on each short side, and use two screws per face driven into both the apron and the leg.
Metal corner brackets are a faster alternative with similar structural effect. Some makers prefer them because they allow for slight seasonal movement in the tabletop, which reduces stress on the joint over time.
Metal hanger bolts and threaded leg connectors offer excellent resistance to loosening because the connection is mechanical rather than glue-dependent. More importantly, the connection can be re-tightened if it does loosen slightly over time, which is a real advantage over glued joints that can’t be tightened once the bond fails.
This is the right choice for furniture that needs to be disassembled for moving, for rental furniture, or for any piece where knock-down capability is a priority. The tradeoff is aesthetic: hardware connectors don’t have the look or feel of traditional hand joinery, and they’re more visible on the underside of the table.
For a table that will stay in one place and is built to last, mortise and tenon or pocket holes with corner blocks will serve better. For a table that needs to come apart and go back together cleanly, hardware connectors are the practical answer.
The best joinery for table legs comes down to one honest question: how long do you want this table to last, and how much skill are you working with right now?
Mortise and tenon with corner blocks is the answer for a table built to outlast its owner. It’s not beginner-friendly, but it’s worth learning. Pocket holes with corner blocks is the answer for a beginner who wants a strong, durable result without years of practice first. Hardware connectors are the answer for furniture that needs to move.
In every case, corner blocks are the upgrade that costs almost nothing and delivers the most direct structural benefit for the exact failure mode that causes wobble. If you take one thing from this guide, make it that.
The joint is where the table lives or dies. Get it right, and the rest of the build is just woodworking.
Why do table legs get wobbly over time even on well-built tables?
The leg-to-apron joint absorbs lateral racking stress every time someone leans on the table or bumps a leg. Even well-fitted glued joints loosen gradually as wood expands and contracts seasonally, repeatedly stressing the glue bond at an angle it wasn’t designed to resist. Mechanical reinforcement (corner blocks, mortise and tenon shoulders, hardware connectors) resists this force structurally, not just adhesively.
Are corner blocks necessary if I’m already using mortise and tenon joints?
Not strictly necessary, but highly recommended. Mortise and tenon joints are strong on their own, and adding corner blocks makes them significantly more resistant to racking over the long term. The extra material and time cost is minimal compared to the structural benefit.
Can I fix a wobbly table without taking it apart?
Often yes. If the joint is in early-stage looseness with no visible gap or cracked wood, adding corner blocks to the inside of the leg-to-apron joints can stabilize the table without disassembly. If the joint has failed structurally (visible movement, cracked wood, stripped screws), disassembly and re-gluing is the proper repair.
Is a Kreg jig strong enough for a dining table?
A Kreg jig (pocket hole joinery) is strong enough for a dining table if you reinforce every leg-to-apron joint with corner blocks. Pocket holes alone are not sufficient for a high-use dining table, but the combination of pocket holes and corner blocks is a genuinely durable approach for most home use applications.
What’s the difference between a loose tenon and a traditional mortise and tenon?
A traditional mortise and tenon has the tenon cut as an integral part of the apron rail. A loose tenon (used with tools like the Festool Domino) is a separate piece of wood that fits into matching mortises cut in both the apron and the leg. Both are strong and structurally similar; loose tenon joinery is faster to execute and widely used by professional furniture makers.
Do I need special tools to cut mortise and tenon joints?
Not necessarily. Mortises can be cut with a router and straight bit, a dedicated benchtop mortiser, or hand tools (a mortise chisel and mallet). Tenons can be cut on a table saw, bandsaw, or with hand tools. The tool requirement is modest; the skill requirement is higher, particularly in fitting the joint precisely.
How do I know which joinery method is right for my skill level?
Start with pocket holes and corner blocks for your first table. They require a pocket hole jig, a drill, and basic measuring skills. Once you’ve built one or two tables and are comfortable with the workflow, add mortise and tenon to your skill set. The beginner woodworking section has a useful skill progression guide if you’re mapping out what to learn next.
Does wood species affect how strong the joint is?
Yes, meaningfully. Hardwoods (oak, maple, cherry, walnut) produce stronger mortise and tenon joints than softwoods (pine, poplar) because the wood fibers are denser and resist compression and shear better. For a dining table that will see heavy use, building the legs and aprons from hardwood is worth the additional material cost. The wood types and material selection guide covers species selection for furniture in more detail.
Can I use dowel joinery on a table that already has loose joints?
Dowel joinery is not a practical repair method for an existing table because it requires drilling precisely aligned holes in both mating surfaces. For repairs, corner blocks or hardware brackets are the more accessible and effective options.
How long should I clamp a mortise and tenon joint after gluing?
A minimum of two hours for most PVA woodworking glues under normal shop conditions (above 50 degrees Fahrenheit, moderate humidity). Full cure takes 24 hours. Don’t stress the joint or remove clamps before the minimum time, and allow full cure before putting the table into use.
These are the tools and materials that come up repeatedly in any serious table-building project. Nothing here is exotic or expensive; these are practical recommendations based on what actually gets used.
Pocket hole jig: The Kreg R3 or Kreg 720 are the standard beginner and intermediate options. The R3 is smaller and more portable; the 720 has a built-in clamp and is faster for production work. Either one handles table leg joinery well when paired with corner blocks.
Kirschen chisel set: A basic set of bench chisels works for hand-cut mortises, but a dedicated mortise chisel (thicker blade, designed for levering out waste) makes the work faster and cleaner. Narex and Two Cherries both make solid entry-level options.
Router and straight bit: A mid-range fixed-base router (DeWalt DWP611 or Bosch Colt are popular choices) with a 1/2-inch or 3/4-inch straight bit handles mortise routing cleanly. A router table makes the work more repeatable if you’re cutting multiple joints.
Loose tenon tool: The Festool Domino DF 500 is the professional standard and is priced accordingly. The Mafell Duo Dowel and several router-based jigs offer similar function at lower cost. For a beginner, a router jig is the most accessible entry point.
Corner brackets: Rockler and Woodcraft both sell metal corner table brackets in packs of four or eight. They’re inexpensive and faster to install than wood corner blocks. For a traditional look, cut your own from scrap hardwood.
Wood glue: Titebond II is the standard for furniture joinery. It’s strong, widely available, and has a reasonable open time for fitting joints. Titebond Original (Type I) has a slightly longer open time, which is helpful for complex assemblies with multiple joints.
For full table plans with cut lists and joinery specifications, the woodworking plans library and the indoor furniture plans section are good starting points. If you’re looking to develop your joinery skills more systematically, the woodworking online training resources cover mortise and tenon, dowel joinery, and pocket hole techniques with video instruction.
Key Takeaways

Why Table Legs Loosen in the First Place
What Are the Different Types of Table Leg Joinery?
Mortise and Tenon vs Dowel Joinery for Table Legs
How Much Stronger Is Mortise and Tenon Joinery?
Best Joinery for Heavy-Duty Dining Tables
Can I Use Pocket Holes for Table Legs?
How to Reinforce Table Leg Joints
Cut triangular blocks from scrap wood (roughly 3 to 4 inches on each short side) and glue and screw them into the inside corner where the apron meets the leg. Use two screws per face, driving into both the apron and the leg. This adds significant racking resistance for minimal material cost and about 15 minutes of work per joint.
Commercially available steel corner brackets (sometimes called table leg brackets or figure-8 fasteners) serve the same function as wood corner blocks and are faster to install. They also allow for slight seasonal movement, which can be an advantage on solid wood tops.
Adding a lower stretcher rail connecting opposite legs triangulates the structure and dramatically reduces the racking stress that reaches the leg-to-apron joint. This is especially effective on long dining tables.
If a joint has already loosened, the most effective repair is to disassemble it (carefully), clean off the old glue with a chisel and sandpaper, and re-glue with fresh PVA or hide glue, then add corner blocks before reassembly. Injecting glue into a loose joint without disassembly is a temporary fix at best.
What Joinery Do Furniture Makers Use for Table Legs?
Is Dowel Joinery Good Enough for Table Legs?
Mortise and Tenon vs Box Joint for Table Legs
How Do I Know If My Table Joints Are Failing?
How to Fix Loose Table Leg Joints
What Joinery Works Best for Round vs Square Table Legs?
Do I Need to Use Wood Glue with Mortise and Tenon Joints?
Best Joinery for Beginner Woodworkers Making Tables
Mortise and Tenon: The Strongest Standard Joinery for Table Legs
Corner Blocks: The Practical Reinforcement Every Table Needs
Hardware Table Leg Connectors: Best for Knock-Down Furniture
Conclusion
Frequently Asked Questions
Products, Tools, and Resources