
Woodworking Joinery and Techniques: Build Skills That Last
Hey there! Some links on this page may be affiliate links, which means that if you choose to make a purchase, I may earn a commission at no extra cost to you. I greatly appreciate your support! Woodworking joinery & techniques are the core skills that determine whether a finished piece holds together for decades or fails under everyday use. Joinery covers how wood pieces connect, from simple pocket holes to hand-cut dovetails, while technique covers everything from accurate measuring to finishing. If you already know your way around a workbench and want to build furniture that actually lasts, this guide covers every major skill area you need.
Key Takeaways: Two woodworkers can follow the exact same plan and produce wildly different results. A plan tells you what to build. Technique tells you how to execute each step with precision, and that gap is where most projects succeed or fail.
The difference between furniture that looks handmade in a good way and furniture that looks handmade in a bad way almost always comes down to four things:
Wood is a living material even after it leaves the tree. It expands and contracts with seasonal humidity changes. A joint that ignores wood movement will crack, loosen, or buckle within a few years, regardless of how carefully it was cut. Understanding this is what separates woodworkers who build lasting pieces from those who keep wondering why their joints keep failing.
If you are brand new to the craft, the beginner woodworking projects section is a better starting point. This guide assumes you already have basic shop experience and are ready to build real, transferable skill on top of that foundation.
Every woodworker needs a working vocabulary of at least five or six joints before they can make smart structural decisions. These are the foundational joints that cover the majority of furniture and cabinetry applications.
Butt joint: The simplest joint possible. Two pieces of wood meet at a right angle and are held together with glue, screws, or nails. Fast to cut, but weak on its own without mechanical reinforcement. Good for light-duty boxes and frames.
Pocket hole joint: A screw is driven at an angle through a pre-drilled pocket in one board and into the face of another. Fast, beginner-friendly, and strong enough for most cabinet and furniture face frames. According to Kreg’s joinery guide, pocket hole joinery is one of the most widely used methods in modern furniture construction precisely because of its speed and accessibility.
Lap joint: Two boards overlap, with material removed from each so they sit flush. Strong in shear, easy to cut with a table saw or router. Common in frame construction and workbenches.
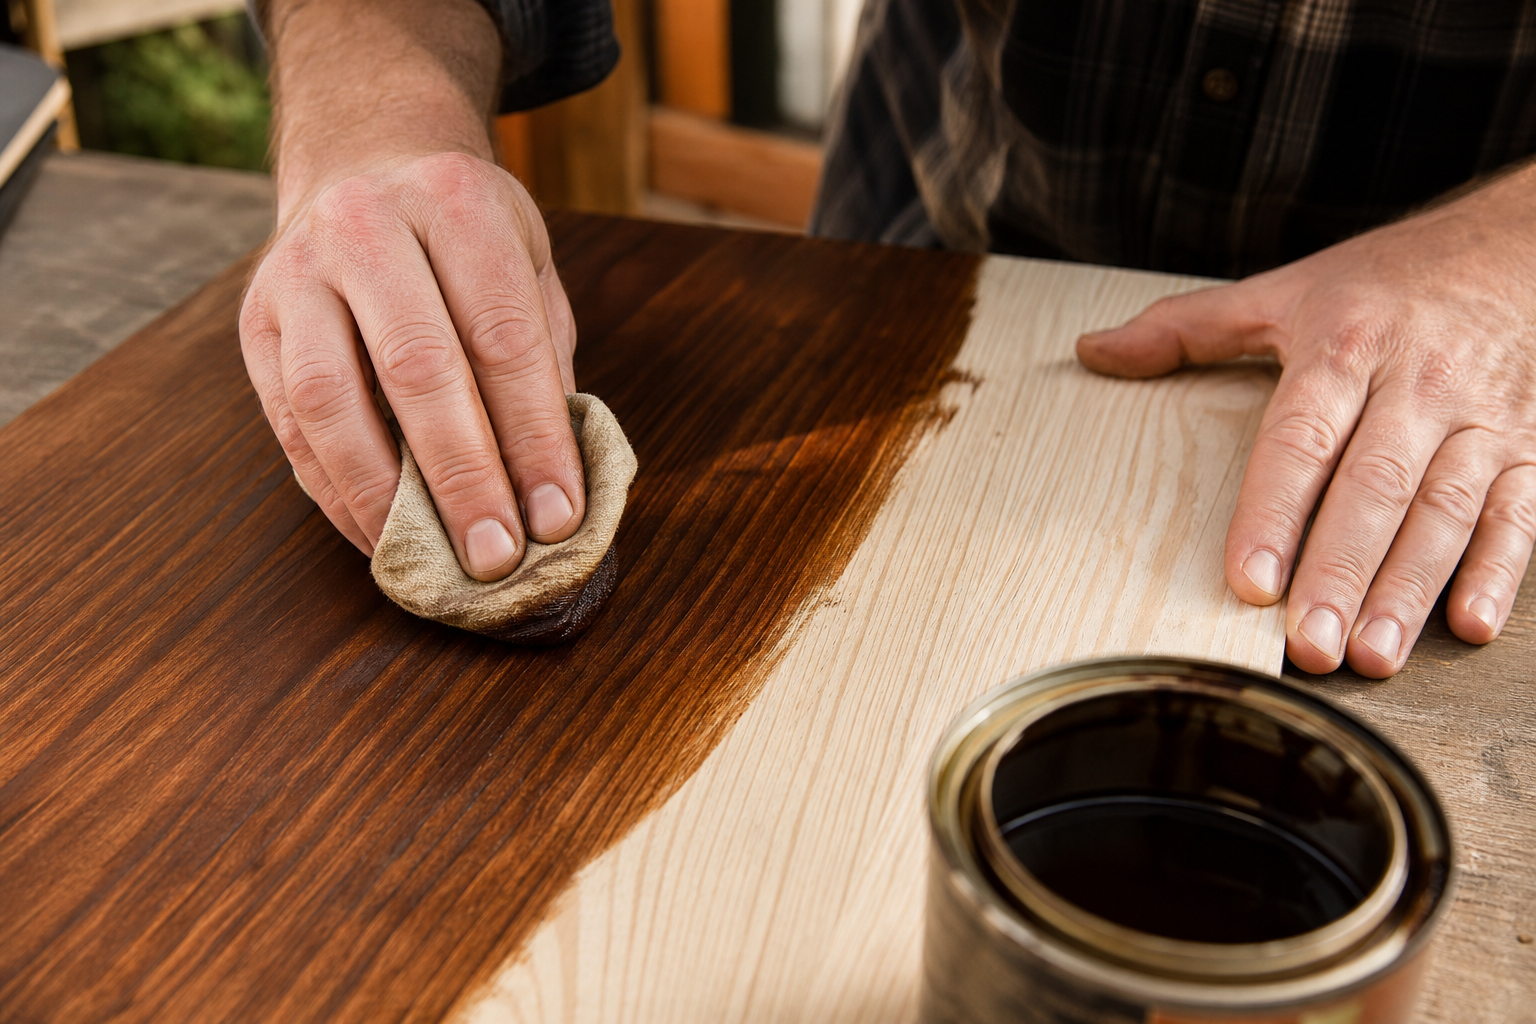
Mortise and tenon joint: A rectangular tenon (a projecting tongue) fits into a matching mortise (a rectangular cavity). One of the oldest and strongest joints in woodworking. Used in chair legs, table aprons, and door frames.
Dovetail joint: Interlocking fan-shaped pins and tails that resist being pulled apart. Visually distinctive and extremely strong in tension. The standard joint for drawer boxes and cabinet carcasses.
Dado and rabbet joints: Channels or grooves cut across or along the grain to receive another board. Essential for shelving, drawer bottoms, and cabinet backs.
As Fine Power Tools explains in their joint type overview, each joint type was developed to solve a specific structural problem, and using the wrong one is a more common mistake than cutting it poorly.
Both are traditional hand-cut joints with centuries of use behind them, but they solve different structural problems and are not interchangeable.
Mortise and tenon joints resist racking and shear forces. They are the right choice when two pieces meet at a right angle and need to hold under lateral stress, such as a chair leg meeting a seat rail, or a table leg connecting to an apron. A well-cut mortise and tenon, glued properly, is one of the strongest wood-to-wood connections available without metal fasteners.
Dovetail joints resist tension. The interlocking geometry means the joint physically cannot be pulled apart along one axis without destroying the wood itself. This makes dovetails the standard for drawer construction, where the joint is constantly being pulled outward when the drawer opens.
Choosing between them is straightforward once you understand the load:
Real Woodwork Plans covers the structural logic behind each joint type in useful detail, including how glue surface area affects overall joint strength.
Choose your joint based on three factors: the direction of the stress the joint will face, the species of wood you are working with, and whether the piece will be used indoors or outdoors.
By stress direction:
By wood species: Softwoods like pine have lower density and can strip or split under aggressive joinery. Pocket screws, for example, hold better in hardwoods. Hand-cut dovetails are easier to execute cleanly in straight-grained hardwoods like cherry, walnut, or white oak than in knotty pine.
By environment: Outdoor furniture needs joints that can handle moisture cycling and UV exposure. Mortise and tenon joints with waterproof glue (resorcinol or epoxy) outperform pocket holes outdoors, where the screw-to-wood interface can corrode and loosen over time.
The Carbitool complete guide to wood joints offers a practical decision framework organized by application type, which is worth bookmarking as a reference.
The pocket hole joint is the easiest joint to start with, and the butt joint reinforced with glue and screws is even simpler. Most beginners should work through joints in this order:
The reason to follow this sequence is that each joint introduces a new concept without overwhelming the beginner with too many variables at once. Pocket holes teach you about clamping and alignment. Lap joints teach you about material removal. Mortise and tenon teaches you about fitting and tolerances. Dovetails teach you about layout, sawing to a line, and paring with a chisel.
A woodworking jig for pocket holes (the Kreg Jig is the most widely used) is one of the first tools worth buying because it lets beginners produce clean, functional joints immediately while they build other skills in parallel.
Pocket holes are strong enough for many furniture applications, but they do not match the structural strength of a well-cut mortise and tenon or dovetail for high-stress connections. This is a nuanced answer, not a simple yes or no.
For face frames, cabinet carcasses, and light-duty tables, pocket hole joinery performs well under normal household loads. The joint is fast to cut, requires minimal setup, and produces consistent results even for beginners.
For high-stress connections, specifically chair leg-to-rail joints, table leg-to-apron joints, and any joint that will face repeated racking forces, pocket holes are not the best choice. The screw relies on the wood’s holding strength rather than mechanical interlocking geometry, and over time, under cyclic loading, the joint can loosen.
The Woodwork Starter’s 2025 joinery guide puts it plainly: pocket hole joinery excels in speed and accessibility, but traditional mortise and tenon joints offer superior long-term structural performance in load-bearing applications.
The practical rule: use pocket holes where speed matters and loads are moderate. Use mortise and tenon or bridle joints where structural integrity is non-negotiable.
Yes, entirely. Most traditional joints were developed centuries before power tools existed and are still cut by hand today. Hand tool joinery requires more time and practice, but it produces results that are equal to or better than machine-cut joints when executed well.
The core hand tools for joinery are:
The Home Woodworker’s guide on joining wood without expensive tools makes a compelling case that hand tool joinery is not just a fallback for those without power tools. It is a distinct skill set that gives woodworkers more control over fit and finish, especially in tight or irregular situations where a router or table saw cannot reach.
Hand tool joinery is also quieter, produces less dust, and requires a smaller physical footprint in the shop. Many experienced woodworkers who own full machine setups still prefer to cut dovetails and mortises by hand.
Joints fail for a small number of predictable reasons. Identifying which one applies to your situation makes the fix straightforward.
Glue failure: The most common cause. Either the joint was not clamped tightly enough during glue-up, the surfaces were not clean and flat before gluing, or the wrong glue was used for the application. Yellow PVA wood glue (Titebond II or III) is the standard for most interior furniture. Outdoor furniture needs waterproof glue. Oily exotic woods like teak or cocobolo need epoxy because PVA does not bond well to their natural oils.
Poor fit: A joint that is too loose has insufficient glue surface contact. A joint that is too tight can split the wood when assembled. The target fit for most mortise and tenon joints is snug enough to hold together without glue but loose enough to push together with hand pressure.
Wrong joint for the load: A butt joint held with glue alone will fail under racking stress. A pocket hole joint in an outdoor chair will loosen as moisture cycles through the wood. Matching the joint to the load it carries is the single most important structural decision in any project.
Wood movement not accounted for: Wood expands and contracts across the grain with seasonal humidity changes. A joint that glues long grain to cross grain without allowing for movement will crack the wood or break the joint as the wood moves. This is why solid wood tabletops are attached to aprons with figure-8 fasteners or wooden buttons rather than glue.
Wood Reality’s guide to essential joinery techniques covers wood movement in detail and explains why accounting for it is not optional in furniture construction.
Outdoor furniture faces moisture, UV exposure, temperature cycling, and in many climates, freeze-thaw cycles. The best joints for outdoor use are those that use mechanical interlocking geometry rather than relying solely on glue or screws.
Best choices for outdoor furniture:
Joints to avoid outdoors:
Wood species matters too. Teak, white oak, cedar, and black locust are naturally rot-resistant and hold joints well outdoors. Pine and poplar are not good choices for outdoor furniture regardless of joint type.
Practice on cheap wood first, always. Construction-grade pine from a home center costs a fraction of what hardwood costs, and it machines and chisels similarly enough to build real technique. Cut the same joint ten times in pine before you touch your walnut or cherry.
Other effective practice strategies:
This approach also applies to finishing. Test your stain and finish combination on a scrap piece from the same board before applying it to the finished project. Blotching, grain raising, and color shifts are much easier to troubleshoot on a test piece than on a completed table.
You do not need to hand cut joints to produce strong, professional-quality furniture. Many of the strongest joints in production furniture are cut entirely with machines. The table saw, router table, and drill press handle the majority of joint cutting in most modern shops.
What machines do well:
What hand tools still do better:
The honest answer is that most experienced woodworkers use both. Machines handle the bulk of material removal quickly and consistently. Hand tools handle the fitting and refinement. If you are just starting out, a pocket hole jig and a decent set of chisels will cover the majority of joinery situations you encounter in the first few years.
Joinery is the single highest-leverage skill in woodworking. A project’s structural integrity depends almost entirely on whether the right joint was chosen and cut correctly for the load it will carry.
This is not about memorizing every joint type. It is about understanding the logic behind joint selection so you can make good decisions on any project, including ones you have never built before.
The full spectrum runs from beginner-friendly to advanced:
Beginner joints: Butt joint, pocket hole joint, dowel joint The Spruce Crafts’ overview of 13 wood joinery methods is a useful reference for understanding where each joint sits in this spectrum and what applications it was designed for.
For beginners exploring their first woodworking plans, starting with projects that use pocket holes and lap joints lets you build real furniture while developing the accuracy and patience that more demanding joints require.
Most woodworkers need between 20 and 50 practice joints before their hand-cut dovetails look clean and fit tightly. That is not discouraging. It is realistic, and knowing it upfront helps you approach the learning curve with the right expectations.
The skills involved in hand-cut dovetails are:
The most common beginner mistake is sawing on the wrong side of the line. The saw kerf (the width of material the blade removes) needs to stay on the waste side of the marked line, not on the finished side. Getting this habit right early makes every other joint faster and more accurate.
A useful benchmark: if your first dovetail joint fits together without gaps and does not require a mallet to close, you are ahead of most beginners. Most first attempts have gaps. That is normal. The gap tells you exactly what to practice next.
Curved and irregular pieces require joinery methods that can accommodate non-right-angle connections and non-flat glue surfaces. This is where standard joinery logic needs adaptation.
Common approaches for curved work:
For woodworkers interested in exploring woodworking patterns that incorporate curves, understanding bent lamination is the most accessible starting point because it does not require a steam box and produces predictable, repeatable results.
Most joinery mistakes are not random. They cluster around a handful of predictable errors that beginners make repeatedly until someone points them out.
Measuring from the end of the tape: The metal hook on a tape measure has intentional play built in. It slides slightly to compensate for whether you are hooking it over an end or butting it against a surface. Measuring from the 1-inch mark and subtracting is more accurate for critical measurements.
Skipping the test cut: Cutting directly into a finished piece without a test cut first is the single most expensive habit in a beginner’s shop. Always cut a test joint in scrap first.
Not accounting for kerf: A saw blade removes material. If you cut on the line rather than to the waste side of the line, your piece will be a blade-width short. This matters most in joinery where fit tolerances are tight.
Rushing glue-up: Glue needs adequate clamping pressure and time to cure. Most PVA glues need at least 30 minutes of clamping time and 24 hours before the joint should be stressed. Rushing this step produces joints that appear solid but fail early.
Ignoring grain direction when chiseling: Chiseling into the grain rather than with it causes tearout and blowout. Always read the grain direction before making a chisel cut and work in the direction that keeps the chisel from diving into the wood.
Over-sanding: Sanding past 180 grit on most wood species closes the grain and reduces stain penetration. More sanding does not always mean a better finish.
For a broader look at the equipment used in woodworking and how setup errors contribute to joinery problems, reviewing your tool calibration is a good first step when joints are consistently coming out wrong.
Finishing is the step most tutorials rush through, and it is where the majority of visible project failures happen. Blotchy stain on pine, streaky polyurethane, a finish that scratches or watermarks within months: these are almost always caused by skipping preparation steps or choosing the wrong product for the application.
The finishing decision tree:
The steps most tutorials skip:
Accurate cutting and measuring are not glamorous skills, but they are the foundation that every other technique depends on. A perfectly designed joint cut to the wrong dimension is a failed joint.
The fundamentals that matter most:
Reading a tape measure accurately: The smallest graduations on a standard tape measure are 1/16 inch. For joinery work, a marking knife and a combination square are more accurate than a tape measure for transferring dimensions directly to the wood.
Understanding kerf: Every saw blade removes material equal to its kerf width (typically 1/8 inch for a standard table saw blade, less for a thin-kerf blade). When cutting multiple pieces to the same length, always account for the kerf between cuts.
Cutting with grain direction: Cutting across the grain (crosscutting) and cutting with the grain (ripping) require different blade geometries and different techniques. Using a rip blade for crosscuts produces tearout. Using a crosscut blade for ripping produces burning and binding.
Tear-out prevention in plywood: Plywood tears out on the exit face of a cut. When using a circular saw, cut with the good face down. When using a table saw, cut with the good face up. Scoring the cut line with a marking knife before sawing reduces tearout on both faces.
Squareness: A project that is not square will not assemble correctly, and joints that were cut accurately will appear to fit poorly. Check squareness at every stage with a reliable combination square or framing square, not just at final assembly.
Once joinery, finishing, and cutting are reliable and consistent, the next level of skill opens up. Advanced techniques are not shortcuts. They are extensions of the fundamentals applied to more complex problems.
Hand carving: Removing material with gouges and chisels to create three-dimensional relief or sculptural forms. The entry point is relief carving on flat panels. Full sculptural carving takes years to develop.
Steam bending and bent lamination: Steam bending softens wood fibers temporarily, allowing the wood to be bent over a form and held until it dries in its new shape. Bent lamination achieves similar curves by gluing thin strips over a form. Both techniques are used for chair backs, curved aprons, and decorative elements.
Marquetry and inlay: Decorative wood veneers or solid wood pieces are cut and fitted into a surface to create patterns or images. Requires precise knife work and a steady hand. The learning curve is real, but the results are visually striking.
CNC woodworking: A CNC (computer numerical control) router uses a digital design file to cut precise, repeatable shapes and joinery. Useful for production runs, complex inlay work, and signage. CNC does not replace hand skill. It adds a different kind of capability, particularly for repetitive or geometrically complex work that would be extremely time-consuming to cut by hand.
For woodworkers ready to explore woodworking projects that incorporate these advanced techniques, the key is to build the underlying fundamentals first. Every advanced technique is easier when accurate measuring, clean cutting, and solid joinery are already second nature.
Is pocket hole joinery strong enough for furniture? What is the strongest wood joint without metal fasteners? Why is my stain blotchy on pine? How do I know if my wood joint is square? What wood is best for learning joinery? Do I need a workbench to do joinery? How long should I wait between coats of polyurethane? What is the best first joinery project for a beginner? Can I use regular wood glue for outdoor furniture? What does “cutting to the line” mean in joinery? How do I prevent tearout when cutting plywood? What is a drawbored mortise and tenon? Woodworking techniques and joinery are not a checklist you complete once and move on from. They are a set of skills you build incrementally, each one making the next easier and more intuitive. The woodworkers who produce furniture that lasts generations are not necessarily the ones with the most expensive tools or the most elaborate plans. They are the ones who took the time to understand why each joint works, how wood moves, and what a finish actually needs to do.
Start with the basics. Cut the same joint ten times before you cut it in a finished piece. Test your finish on scrap. Measure twice, and when in doubt, measure a third time. The fundamentals are not the boring part of woodworking. They are the part that makes everything else possible.
These are the tools and resources that consistently come up as genuinely useful for woodworkers building joinery skills, based on what experienced builders actually recommend rather than what gets the most marketing attention.
Kreg Jig K5 or K4: The standard pocket hole jig for most hobbyist and semi-professional work. The K4 handles the majority of applications. The K5 adds a built-in clamp that speeds up production. If you are building cabinets or furniture frames regularly, a pocket hole jig is one of the most practical investments in the shop.
Titebond III Wood Glue: The most versatile wood glue for woodworkers who build both indoor and outdoor pieces. Water-resistant, strong long-grain glue bond, and widely available. Keep both Titebond II (for interior work) and Titebond III (for anything that might see moisture) on hand.
A quality set of bench chisels: Narex bench chisels are the standard recommendation for beginners who want quality without paying premium prices. The 1/4, 1/2, 3/4, and 1-inch set covers the majority of joinery work. Keep them sharp. A dull chisel is more dangerous and less accurate than a sharp one.
A combination square: A reliable 12-inch combination square is one of the most-used tools in any joinery-focused shop. It checks squareness, marks lines parallel to an edge, and sets depths. The Starrett No. 11 is the benchmark for accuracy. The Empire and Irwin versions are adequate for most hobbyist work.
Woodworking online training: If you want structured, step-by-step instruction rather than piecing together techniques from individual videos, woodworking online training courses offer a more systematic approach to building joinery skills. Platforms like Fine Woodworking’s online school and Wood Whisperer Guild are well-regarded in the woodworking community.
Popular woodworking plans: Having access to well-designed plans that specify joinery methods (not just dimensions) accelerates learning significantly. Popular woodworking plans that include joinery details give you a model to follow while you are still developing your own judgment about joint selection.
A marking gauge and marking knife: These two tools together are more accurate for joinery layout than a pencil and tape measure. A wheel marking gauge and a simple marking knife with a flat back (for registering against a square) are the standard setup for hand tool joinery work.

Why Technique Matters More Than the Plan
What Are the Basic Woodworking Joints Everyone Should Know
What Is the Difference Between Mortise and Tenon vs. Dovetail Joints
How Do I Know Which Joinery Technique to Use for My Project
What Is the Easiest Joint to Learn First as a Beginner
Is Pocket Hole Joinery as Strong as Traditional Joinery
Can You Use Woodworking Joinery Without Power Tools
Why Does My Wood Joint Keep Falling Apart
What Joints Work Best for Outdoor Furniture
How Do I Practice Joinery Skills Without Wasting Expensive Wood
Do I Really Need to Hand Cut Joints, or Can I Use a Table Saw
Joinery Methods: The Full Spectrum
Intermediate joints: Lap joint, dado, rabbet, bridle joint, mortise and tenon
Advanced joints: Through dovetail, half-blind dovetail, sliding dovetail, wedged mortise and tenon, drawbored mortise and tenon
How Long Does It Take to Master Hand-Cut Dovetails
Wood Joinery Techniques for Curved or Irregular Pieces
Common Mistakes People Make When Learning Woodworking Joints
Finishing and Staining: Where Good Projects Get Ruined
Cutting and Measuring Techniques: The Foundation Everything Else Builds On
Advanced Woodworking Techniques: What Comes After the Fundamentals
Frequently Asked Questions
Pocket hole joinery is strong enough for cabinet face frames, light-duty shelving, and most indoor furniture that does not face high racking stress. It is not the best choice for chair joints, outdoor furniture, or any connection that will be repeatedly stressed in multiple directions. For those applications, mortise and tenon or bridle joints are more appropriate.
The mortise and tenon joint, particularly a drawbored or wedged variation, is widely considered the strongest wood-to-wood connection available. The dovetail joint is stronger in tension specifically, but the mortise and tenon handles a broader range of stress directions.
Blotchy stain on pine is caused by uneven grain density. Softer, more porous areas of the grain absorb stain faster than denser areas, creating an uneven color. Applying a pre-stain wood conditioner before staining largely solves this problem. Alternatively, gel stain sits on the surface rather than penetrating, which also reduces blotching.
Measure diagonally across the assembled joint from corner to corner in both directions. If both diagonal measurements are equal, the assembly is square. If they differ, apply clamp pressure across the longer diagonal to bring the assembly into square before the glue sets.
Straight-grained, knot-free poplar or soft maple is the best wood for learning joinery. It is inexpensive relative to premium hardwoods, machines cleanly, holds detail well, and behaves predictably. Construction pine works for basic practice but has knots and grain irregularities that can complicate learning.
A solid, flat work surface with some way to hold the workpiece is essential. A purpose-built workbench with a vise is ideal, but a sturdy table with clamps works for many operations. The key requirement is that the surface does not flex or move when you are sawing or chiseling.
Oil-based polyurethane typically needs four to eight hours between coats in normal shop conditions (around 70 degrees Fahrenheit and moderate humidity). Water-based polyurethane dries faster, usually two to four hours. Always check the manufacturer’s recommendation and err on the side of waiting longer rather than shorter.
A simple box with butt joints or pocket hole corners is the best first joinery project. It teaches clamping, glue-up, and squareness without requiring precision fitting. Once that is comfortable, a small shelf with dado joints for the shelves is a natural next step that introduces machine joinery.
Standard yellow PVA glue (Titebond Original) is not waterproof and will fail outdoors. Use Titebond III (water-resistant), resorcinol (fully waterproof), or epoxy for outdoor furniture. Titebond III is the most practical choice for most outdoor projects.
Cutting to the line means positioning the saw so the blade removes material on the waste side of the marked line, leaving the line itself on the finished piece. The saw kerf (the width of material the blade removes) should fall entirely in the waste, not in the finished dimension.
Score the cut line with a sharp marking knife before sawing. Use a blade with more teeth (60 to 80 teeth for a 10-inch blade). On a circular saw, cut with the good face down. On a table saw, cut with the good face up. A zero-clearance insert on the table saw also significantly reduces tearout.
A drawbored mortise and tenon is a traditional joint where a hole is drilled through the assembled joint, but the hole in the tenon is offset slightly from the holes in the mortise walls. When a wooden peg is driven through, it pulls the joint tight mechanically. This joint holds even if the glue eventually fails, making it one of the most durable joints in furniture construction.
Conclusion
Products, Tools, and Resources
References