
How to Build a DIY Chicken Coop Shed with Run
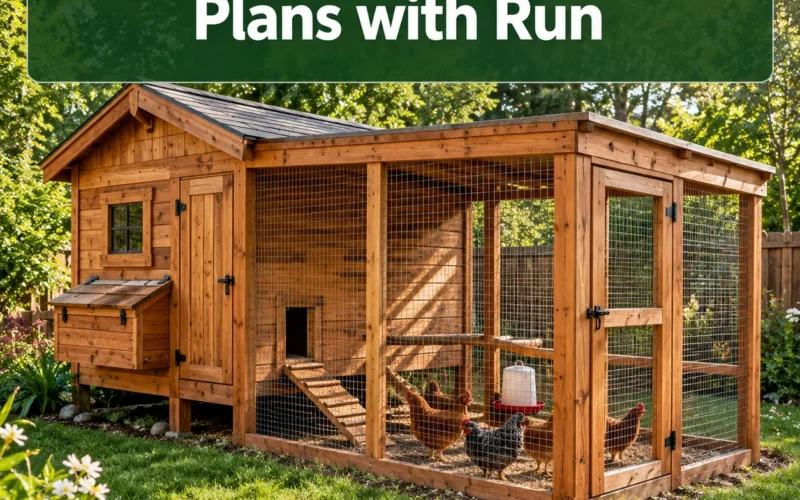
A backyard flock of six hens can produce over 2,000 eggs per year, but only if they have a safe, well-designed home. That’s exactly why getting your DIY chicken coop shed with run right from the start matters more than most first-time builders expect.
This guide covers everything a beginner or hobbyist woodworker needs to know, from choosing the right plan and materials to avoiding the most common building mistakes. Whether you’re working with a tight budget or a generous backyard, there’s a workable approach here for you.
Key Takeaways
- A chicken coop shed with run combines an enclosed sleeping and nesting structure with an attached outdoor fenced area, and both parts are essential for flock health.

- Budget between $300 and $2,000 for a DIY build depending on size, materials, and whether you use free or paid plans.
- Allow 2 to 4 weekends to complete a basic 4×8 to 8×10 coop shed with run as a beginner.
- Plan for 3 to 4 square feet of interior coop space and 8 to 10 square feet of run space per standard-sized chicken.
- Hardware cloth (not chicken wire) is the correct predator-resistant fencing material for the run.
- Ventilation and drainage are the two most overlooked design elements in beginner builds.
- Always check local zoning and permit requirements before breaking ground.
- Free plans work well for simple builds; paid plans offer better detail, material lists, and support for complex designs.
Find this useful? Add us as a preferred source on Google and more of what we publish will show up in your results.
What Is a Chicken Coop Shed with Run and Why Do You Need Both
A chicken coop shed is an enclosed, weatherproof structure where chickens sleep, lay eggs, and shelter from predators and harsh weather. The run is an attached, fenced outdoor area that gives birds access to fresh air and movement without exposing them to predators. You need both because chickens confined to an enclosed shed without outdoor access suffer from stress, reduced egg production, and health problems.
Think of the shed as the bedroom and the run as the yard. The shed handles nighttime safety and nesting. The run handles daytime activity. A well-designed DIY chicken coop shed plans with run setup integrates these two spaces so they work together, with a pop door connecting them and a human-access door on the run for cleaning and feeding.
The two structures serve different purposes:
- The shed provides: roosting bars, nest boxes, insulation, ventilation, and protection from rain and wind.
- The run provides: foraging space, dust bathing areas, sunlight exposure, and exercise room.
Skipping the run and letting chickens free-range entirely works on some rural properties, but for most suburban backyards, an enclosed run is the only realistic way to protect birds from hawks, foxes, raccoons, and neighborhood dogs.
How Much Does It Cost to Build a Chicken Coop Shed with Run
A DIY chicken coop shed with run typically costs between $300 and $2,000, depending on size, lumber quality, and hardware choices. A small 4×6 coop with a 4×10 run for four to six birds can come in under $500 using dimensional lumber and basic hardware cloth. A larger 8×10 shed-style coop with a spacious run for 10 to 15 birds will run closer to $1,200 to $2,000 when built with pressure-treated framing, quality roofing, and proper hardware.
For a realistic cost breakdown, see the table below:
| Component | Estimated Cost Range |
|---|---|
| Framing lumber (2x4s, 4×4 posts) | $80, $250 |
| Plywood sheathing and siding | $60, $180 |
| Hardware cloth (1/2 inch, 19-gauge) | $50, $150 |
| Roofing (metal, shingles, or corrugated) | $40, $200 |
| Hardware (hinges, latches, screws) | $30, $80 |
| Nest boxes, roosting bars | $20, $60 |
| Paint, sealant, preservative | $20, $60 |
| Total (estimated) | $300, $980+ |
These figures are estimates based on typical 2026 lumber and hardware pricing at national home improvement retailers. Costs vary by region, lumber grade, and whether you repurpose salvaged materials.
For a broader look at what drives shed construction costs, the DIY shed building cost comparison guide at Woodworking Guru breaks down the numbers clearly.
Best Chicken Coop Shed Plans for Beginners
The best beginner plans for a DIY chicken coop shed with run are those that use standard lumber dimensions, include a complete cut list, and show clear framing diagrams. A 4×8 or 6×8 gable-roof shed design with an attached 4×12 run is the most manageable first build for someone with basic woodworking skills and a weekend or two to spare.
What makes a plan beginner-friendly:
- Standard 2×4 and 4×4 framing (no custom milling required)
- A cut list with exact measurements for every piece
- Step-by-step assembly sequence, not just a finished drawing
- Details for the pop door, ventilation openings, and nest box placement
- A materials list that maps directly to what you can buy at a hardware store
For woodworkers who are new to shed-style builds, reviewing shed plans for beginners is a smart first step. The structural principles for a small coop shed are nearly identical to those of a garden shed, and that foundation of knowledge transfers directly.
Also, understanding how to read a woodworking plan before you start saves time and prevents costly mistakes. The beginner’s complete guide to reading and using woodworking plans is worth bookmarking.
How Many Chickens Can a Standard Coop Shed with Run Hold
A standard 4×8 coop shed holds 8 to 10 standard-sized chickens based on the widely cited guideline of 3 to 4 square feet of interior space per bird. The attached run should provide at least 8 to 10 square feet per bird, so a 4×8 coop ideally pairs with a run of at least 80 to 100 square feet for a flock of 10.
Overcrowding is one of the leading causes of pecking, stress, and disease in backyard flocks. When in doubt, build bigger than you think you need. Flocks tend to grow.
Quick sizing reference:
- 4 birds: 4×4 coop minimum, 4×10 run minimum
- 6 birds: 4×6 coop, 6×10 run
- 10 birds: 4×8 or 6×8 coop, 8×12 run
- 15 birds: 8×10 coop, 10×16 run
Bantam breeds need slightly less space; heavy breeds like Brahmas or Jersey Giants need more. These numbers apply to standard breeds such as Buff Orpingtons, Plymouth Rocks, and Rhode Island Reds.
Free vs. Paid Chicken Coop Shed Plans: Which Is Better
Free plans are a reasonable starting point for simple builds, but paid plans generally offer more detail, better material lists, and clearer construction sequences for beginners tackling a shed-style coop with run. If you’ve never built a structure with a framed floor, walls, and a pitched roof, a paid plan with step-by-step photos or diagrams is worth the $15 to $50 investment.
Choose free plans if:
- You have prior shed or framing experience
- The design is simple (a basic box with a lean-to roof)
- You’re comfortable adapting incomplete instructions
Choose paid plans if:
- This is your first shed-style build
- You want a complete cut list and material quantities
- The design includes a pitched roof, attached run framing, or interior features like nest boxes and roosting bars
The free vs. paid shed plans comparison at Woodworking Guru walks through exactly what you get at each price point, which applies directly to coop shed projects.
What Materials Do You Need to Build a Chicken Coop Shed with Run
A DIY chicken coop shed with run requires pressure-treated lumber for ground contact, standard dimensional lumber for framing, exterior-grade plywood for sheathing, and 1/2-inch 19-gauge hardware cloth for the run. These are the core materials. Everything else, including roofing, paint, and hardware, supports those four foundations.
Full materials list for a basic 6×8 coop with 6×12 run:
- Pressure-treated 4×4 posts or skid runners (ground contact)
- 2×4 studs for wall and roof framing
- 3/4-inch exterior plywood for flooring
- 1/2-inch exterior plywood for wall sheathing
- 1×6 or 1×8 boards for trim and siding (T1-11 siding is a popular shortcut)
- 1/2-inch 19-gauge hardware cloth (not chicken wire) for run walls and ceiling
- Corrugated metal or asphalt shingles for roofing
- Galvanized screws, joist hangers, and framing hardware
- Heavy-duty hinges and predator-proof latches
- Exterior wood paint or stain and sealant
One note on chicken wire: it keeps chickens in but does not keep determined predators out. Raccoons can tear through it. Hardware cloth is the correct choice for any run wall or floor apron.
How Long Does It Take to Build a Chicken Coop Shed with Run
A beginner woodworker can complete a basic 4×8 to 6×8 coop shed with an attached run in two to four weekends, assuming two people working and all materials pre-cut or staged. A solo builder working carefully should budget four to six weekends for the same project.
The timeline breaks down roughly like this:
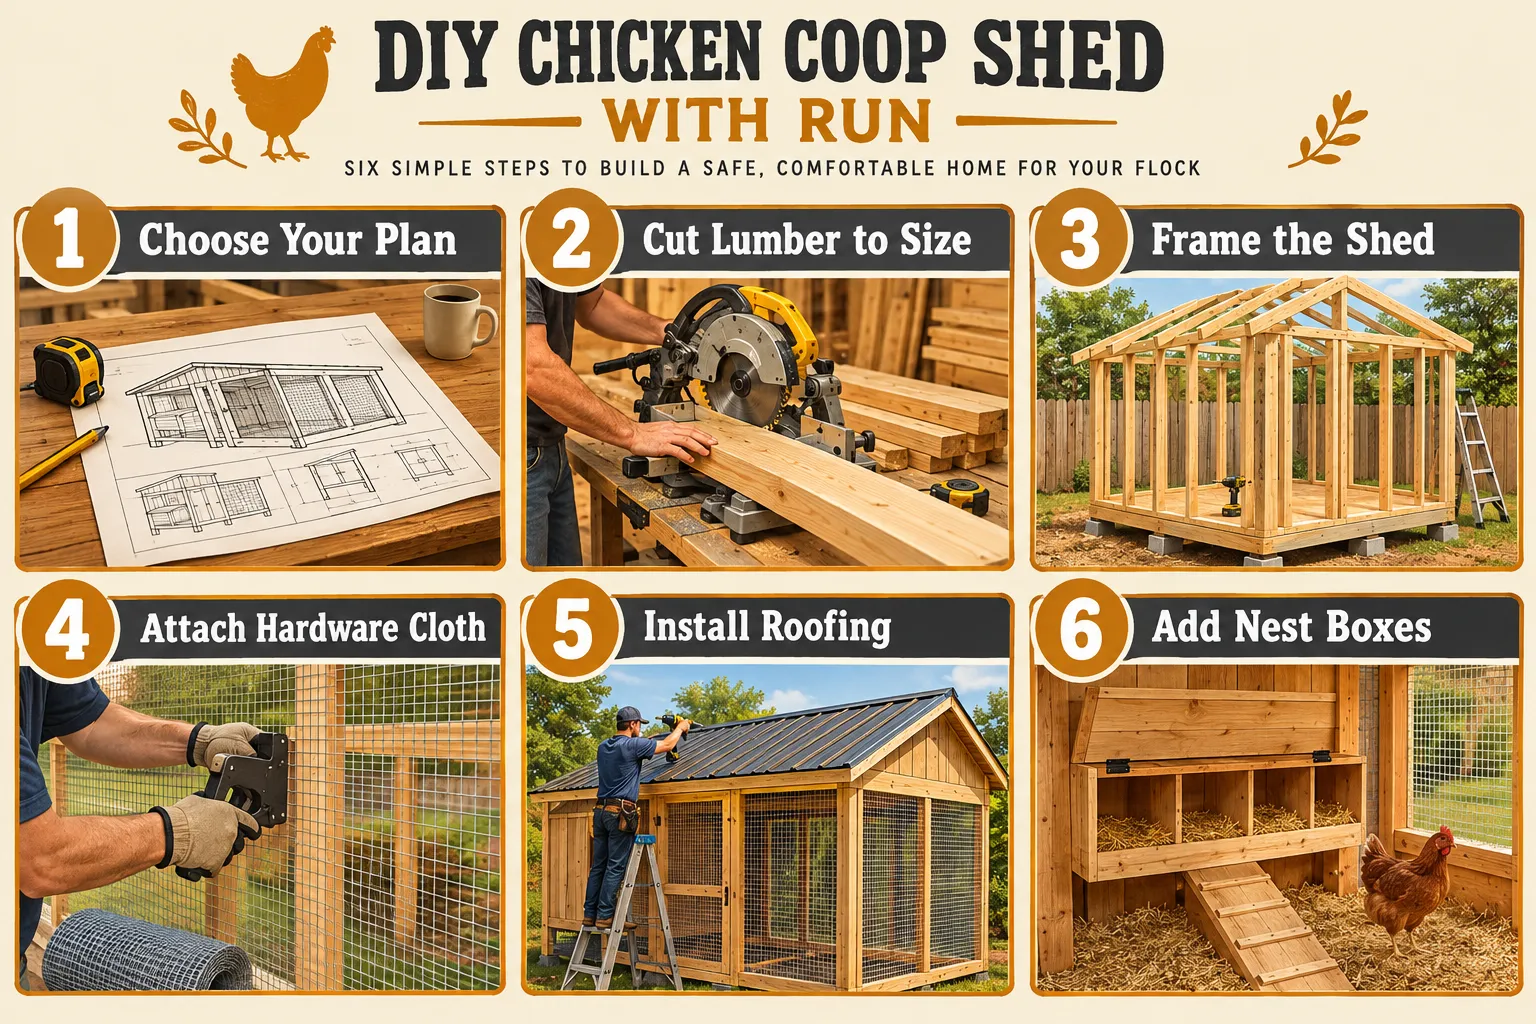
- Weekend 1: Lay the foundation or skids, build and level the floor frame.
- Weekend 2: Frame and sheath the walls, frame the roof.
- Weekend 3: Install roofing, doors, windows, and ventilation openings.
- Weekend 4: Build and attach the run frame, install hardware cloth, add latches and the pop door.
- Weekend 5 (if needed): Paint, seal, install nest boxes and roosting bars, final inspection.
Pre-cutting all lumber before assembly starts saves significant time. If you have access to a miter saw and a circular saw, a full cut list can be processed in a single afternoon.
Predator-Proof Chicken Coop Shed Run Design Tips
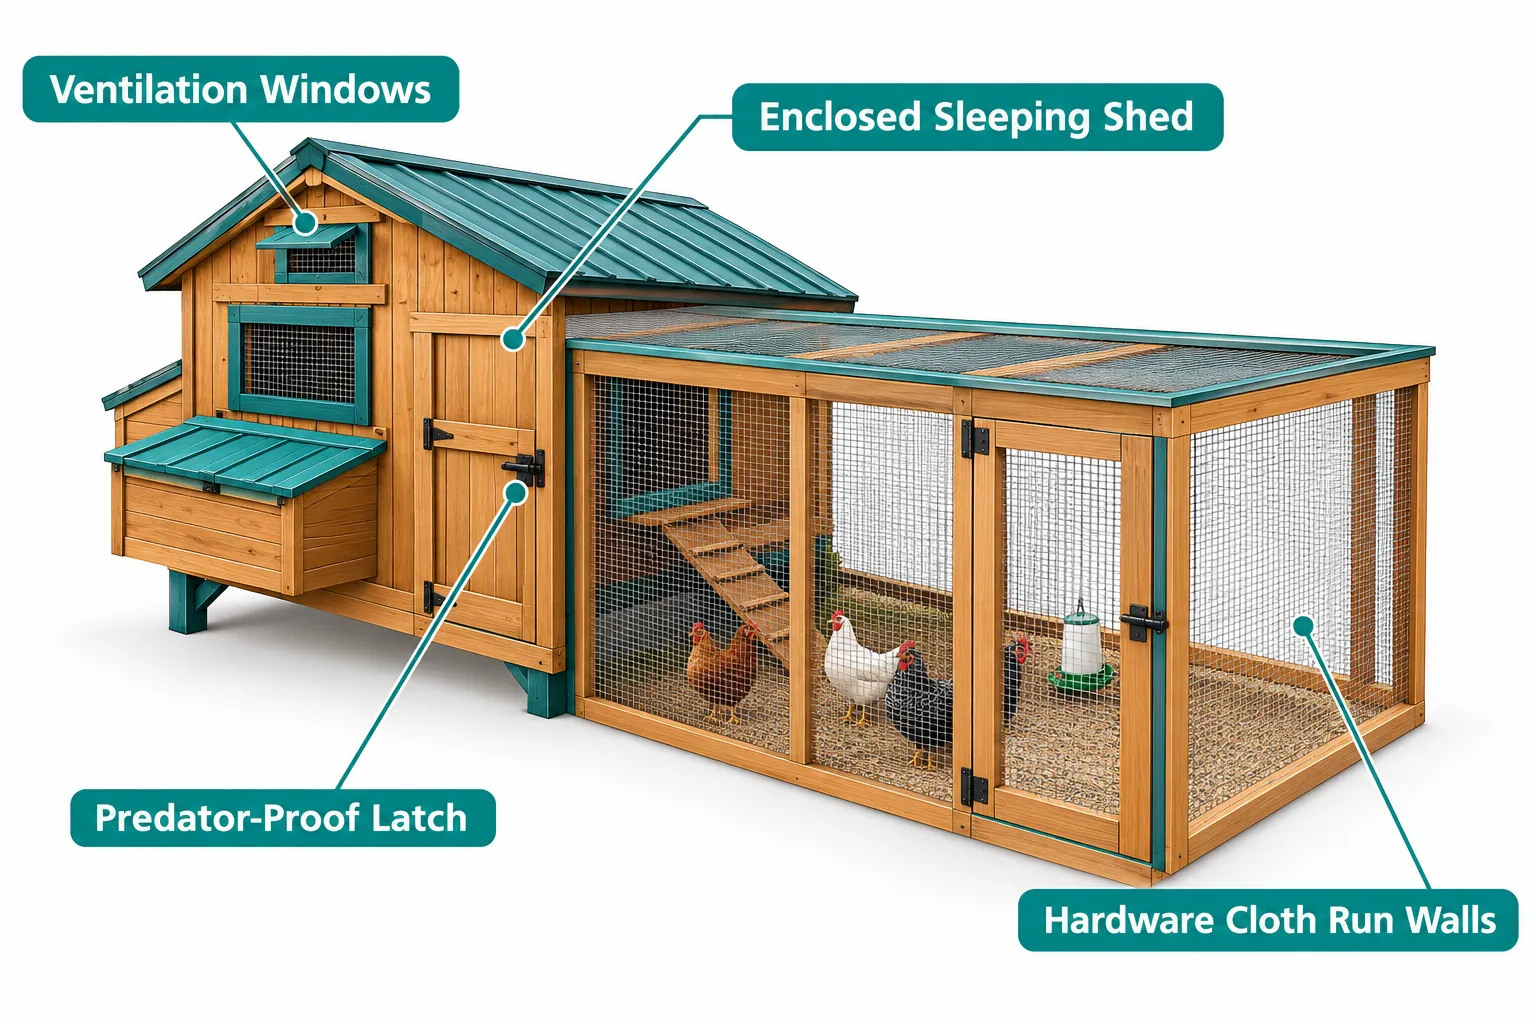
A predator-proof run uses 1/2-inch hardware cloth on all four walls and the ceiling, with an apron of hardware cloth buried 12 inches underground or laid flat on the ground surface and pinned down. This design stops digging predators like foxes and raccoons from tunneling under the run walls.
Key predator-proofing measures:
- Use 1/2-inch 19-gauge hardware cloth, not chicken wire or 1-inch welded wire
- Bury a hardware cloth apron 12 inches deep around the run perimeter, or lay it flat and cover with soil or gravel
- Cover the top of the run with hardware cloth or solid roofing to prevent aerial predators
- Install two-step latches (carabiner clips or slide-bolt latches with a secondary lock) on all doors, since raccoons can open simple hook-and-eye latches
- Seal all gaps larger than 1/2 inch in the coop shed walls and roof
- Use solid wood or metal for the coop shed floor, not wire mesh
Raccoons are among the most persistent and intelligent predators a backyard flock faces. They can reach through chicken wire, unlatch simple closures, and work at a weak point repeatedly over multiple nights. Designing against them from the start is far easier than retrofitting after a loss.
Can You Use a Regular Shed as a Chicken Coop
Yes, a standard garden shed can be converted into a chicken coop, but it requires specific modifications to be safe and functional for chickens. The shed needs ventilation openings near the roofline, a pop door for run access, interior roosting bars, nest boxes, and a hardware cloth apron around any attached run. Without these, a plain shed is too dark, poorly ventilated, and structurally unsuitable.
Modifications a shed conversion typically requires:
- Adding ventilation openings (1 square foot of vent per 10 square feet of floor space is a common guideline)
- Installing a pop door at ground level on the run-facing wall
- Building interior roosting bars at 18 to 24 inches above the floor
- Adding nest boxes (one box per four hens)
- Sealing all gaps and cracks to prevent predator entry
- Attaching an enclosed run with hardware cloth
An existing 8×10 shed is actually an excellent starting point for a larger flock. For reference on 8×10 shed dimensions and framing, the 8×10 shed plans and material list provides useful structural context.
Chicken Coop Shed with Run for Cold Climates vs. Warm Weather
Cold-climate coop sheds need insulation, draft-free ventilation, and moisture control as the primary design priorities. Warm-climate coops prioritize airflow, shade, and pest resistance over insulation. The biggest mistake builders make is applying a cold-climate design to a warm region, which creates a hot, poorly ventilated structure that stresses birds in summer.
Cold climate priorities:
- Insulate walls and ceiling with rigid foam or fiberglass batts
- Use deep bedding (pine shavings) to generate floor warmth
- Install ventilation near the roofline, not at bird height, to prevent drafts while still exhausting moisture
- Consider a heated waterer to prevent freezing
Warm climate priorities:
- Maximize cross-ventilation with large screened openings on opposite walls
- Use a metal or corrugated roof with a ventilated ridge cap
- Provide shade over the run with shade cloth or a solid roof panel
- Elevate the coop floor 12 to 18 inches off the ground for airflow underneath
For insulation guidance that applies directly to shed-style structures, the workshop shed insulation guide covers material choices and R-values in practical terms.
Common Mistakes When Building a Chicken Coop Shed with Run
The most common mistake is building too small, followed closely by poor ventilation design and using chicken wire instead of hardware cloth. These three errors account for the majority of problems beginners encounter after their flock moves in.
Mistakes to avoid:
- Building too small: Always size up. A coop that fits six birds comfortably today will feel cramped when the flock grows to eight.
- Skipping ventilation: Moisture from chicken respiration and droppings causes respiratory disease. Ventilation openings near the roofline are non-negotiable.
- Using chicken wire: It’s not predator-proof. Use 1/2-inch hardware cloth.
- No hardware cloth apron: Digging predators will find the gap under the run wall within weeks.
- Flat or low-slope roofing with no overhang: Water infiltration damages the structure and creates damp bedding conditions.
- No drainage plan for the run: A muddy run breeds bacteria and parasites. Grade the ground away from the structure or add a gravel base.
- Ignoring the pop door placement: The pop door should open directly into the run, not into open yard space.
Do You Need a Permit to Build a Backyard Chicken Coop Shed
Whether a permit is required depends entirely on local zoning ordinances and the size of the structure. In most U.S. municipalities, structures under 120 square feet (roughly a 10×12 footprint) do not require a building permit, but chicken-keeping itself may be subject to separate regulations covering flock size, setback distances from property lines, and whether roosters are allowed.
Before building, check:
- Your city or county zoning code for “accessory structures” and “urban agriculture” provisions
- HOA rules if applicable
- Setback requirements (many municipalities require 10 to 25 feet from property lines)
- Whether a health department permit is needed for poultry keeping
Calling your local planning department takes 10 minutes and can save significant trouble. Rules vary widely, even between neighboring towns.
Chicken Coop Shed Run Ventilation and Drainage Requirements
A coop shed needs at least 1 square foot of ventilation opening per 10 square feet of floor area, positioned near the roofline to exhaust moisture without creating drafts at bird level. The run needs a gravel or sand base, or a slight grade away from the coop, to prevent standing water and mud.
Ventilation checklist:
- Vents placed high on opposite walls for cross-ventilation
- Covered with hardware cloth to prevent predator entry
- Closeable in extreme cold to reduce drafts (but never fully sealed)
Drainage checklist:
- Grade the run floor at least 2 percent slope away from the coop shed
- Add 4 to 6 inches of coarse gravel or construction sand as a base
- Avoid placing the run in a low-lying area that collects rainwater
Poor drainage is the single biggest cause of muddy, unhealthy runs. A gravel base costs relatively little to install during the build and eliminates a persistent maintenance headache.
Mobile vs. Stationary Chicken Coop Shed with Run: Which Is Better
A stationary coop shed with a permanent run is better for flocks of six or more birds, year-round keeping, and climates with harsh winters. A mobile chicken tractor (a smaller, wheeled coop with an attached run) is better for small flocks of two to four birds, rotational grazing, and gardens that benefit from natural fertilization.
Choose a stationary coop shed if:
- Your flock is six or more birds
- You want a full shed-height structure with walk-in access
- You live in a cold climate requiring insulation
- You plan to keep chickens year-round
Choose a mobile tractor if:
- Your flock is two to four small or bantam birds
- You want to rotate birds across a garden or lawn
- You have a small yard and need flexibility
- You don’t want a permanent structure
Most beginners who start with a small tractor end up building a permanent coop shed within a year or two as their flock grows. Building the permanent structure first, sized correctly, is often the more economical long-term choice.
Frequently Asked Questions
What size coop shed do I need for 6 chickens?
A 4×6 coop shed (24 square feet of interior space) is the minimum for six standard-sized chickens at 4 square feet per bird. Pair it with a run of at least 60 to 80 square feet. Sizing up to a 4×8 coop gives more comfort and room to grow the flock.
Can I build a chicken coop shed with no prior woodworking experience?
Yes, with a good beginner plan and basic tools (circular saw, drill, tape measure, and square), a first-time builder can complete a simple coop shed. Starting with a plan designed for beginners and reading it fully before cutting any wood makes a significant difference.
What is the best wood for a chicken coop shed?
Pressure-treated lumber for ground-contact framing, and standard SPF (spruce-pine-fir) 2x4s for wall framing. For exterior sheathing, T1-11 plywood siding is a popular choice because it handles the siding and sheathing in one panel. Avoid cedar shavings inside the coop, as the aromatic oils can irritate respiratory tracts.
How do I keep the run from getting muddy?
Add 4 to 6 inches of coarse construction sand or pea gravel as a base layer. Grade the run floor to slope slightly away from the coop. Avoid placing the run in a drainage low point in the yard.
How often does a chicken coop shed need to be cleaned?
The run benefits from a quick rake every few days. The coop shed interior needs a full cleanout every two to four weeks depending on flock size, bedding type, and ventilation quality. Deep litter method users clean less frequently, but the system requires careful management.
Do I need electricity in my chicken coop shed?
Not strictly required, but a light on a timer can extend laying in winter months, and a heated waterer is nearly essential in freezing climates. If adding power, follow safe wiring practices. The guide to wiring a workshop shed for power tools covers the fundamentals of running power to a shed safely.
What is the best roof style for a chicken coop shed?
A gable roof is the most common and easiest to frame for beginners. It sheds rain and snow well, allows for ventilation at the peak, and looks clean. A lean-to (shed roof) is even simpler to build and works well for smaller coops. For a detailed comparison, the shed roof style guide covers gable, lean-to, and barn options.
How do I predator-proof the bottom of the run?
Attach a hardware cloth apron to the base of the run walls and either bury it 12 inches vertically underground, or lay it flat on the soil surface extending 12 to 18 inches outward and pin it down. Cover the flat apron with soil, gravel, or mulch. This stops digging predators from tunneling under the wall.
Is it cheaper to buy a prefab coop or build one?
For a quality structure that fits a flock of six or more birds, DIY almost always costs less than a comparable prefab unit. Many prefab coops sold at retail are built from thin materials and are smaller than advertised capacity suggests. The prefab shed kits vs. building from scratch comparison addresses this trade-off in detail.
Can I attach the run to an existing garden shed?
Yes. An existing shed can serve as the enclosed coop portion. Cut a pop door opening in the wall facing the run location, frame and hang the pop door, then build and attach the run structure directly to the shed wall. Seal the junction between the shed wall and run framing to close any gaps.
Conclusion
Building a DIY chicken coop shed with run is one of the most rewarding first projects for a beginner woodworker. It combines real structural skills, practical problem-solving, and a result that gets used every single day. The key is starting with a plan that matches your current skill level, sizing the structure correctly for your flock, and not cutting corners on hardware cloth and ventilation.
Actionable next steps:
- Decide on flock size first, then size the coop and run from there.
- Check local zoning and permit requirements before purchasing materials.
- Choose a beginner-appropriate plan with a full cut list and clear framing diagrams.
- Source pressure-treated lumber for ground contact and 1/2-inch hardware cloth for the run before anything else.
- Build the floor frame first, get it level, and work up from there one section at a time.
The skills developed on this project, framing walls, cutting rafters, installing hardware, and weatherproofing a structure, carry directly into every shed and outdoor woodworking project that follows.
Products, Tools, and Resources
Essential tools for this build:
- Circular saw for breaking down sheet goods and cutting framing lumber
- Cordless drill/driver for fastening framing and hardware
- Speed square and tape measure for accurate layout and checking square
- Miter saw (optional but highly recommended) for consistent crosscuts on studs and rafters
- Staple gun or fencing staples for attaching hardware cloth to the run frame
- Level (4-foot) for keeping walls plumb and floors level
Materials worth spending more on:
- 1/2-inch 19-gauge hardware cloth (not the cheaper 1-inch welded wire)
- Galvanized or stainless screws rated for exterior use
- Exterior-grade wood glue for any joints that will face weather
- Quality predator-proof latches with a two-step opening mechanism
Further reading on Woodworking Guru:
- The complete guide to building your own backyard shed for foundational shed-building skills
- Best shed size for suburban lots for help choosing the right footprint
- How much does it cost to build a small shed for a detailed cost breakdown
Building with confidence starts with the right plan and the right information. Both are now in hand.