
DIY Shed Building Checklist (Printable)
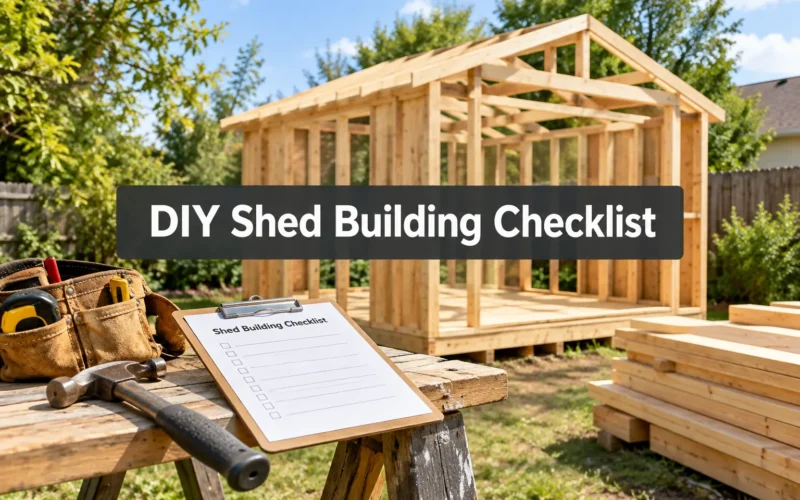
Roughly 70 percent of DIY shed projects stall out somewhere between the foundation and the roof, not because the builder lacks skill, but because nobody wrote down the order of operations before the first board got cut. A printable checklist fixes that single point of failure. This DIY Shed Building Checklist (Printable) walks you through every phase of the build, from permits to paint, so you can work from a list instead of a guess.
This guide is built for beginners and hobbyist woodworkers who want a dependable, step-by-step reference they can print, clip to a board, and check off in the yard. It covers planning, tools, cost, foundation prep, permits, materials, and waterproofing, with a downloadable-style checklist structure you can recreate on paper or in a notebook.
Find this useful? Add us as a preferred source on Google and more of what we publish will show up in your results.
Key Takeaways
- A complete DIY Shed Building Checklist (Printable) should cover six phases: planning, site prep, foundation, framing, roofing/siding, and finish work.
- Most 8×10 to 10×12 sheds take a beginner between 3 and 6 full weekends to complete, depending on experience and weather.
- Basic hand and power tools (circular saw, drill, level, speed square, tape measure) cover 90 percent of shed-building tasks.
- Shed costs for DIY builds typically range from $1,500 to $7,000 depending on size and materials, well below prefab kit pricing for comparable square footage.
- Many municipalities allow sheds under 120 square feet without a permit, but local rules vary and must be confirmed before digging footings.
- Skipping ground prep or foundation leveling is the single most common mistake that leads to doors that stick and floors that rot.
- Waterproofing starts at the foundation, not the roof, and includes drainage, flashing, and a quality exterior paint or stain system.
What Should You Include in a DIY Shed Building Checklist (Printable)?
A thorough shed checklist should include six phases: pre-build planning, site and ground prep, foundation, framing, roof and siding, and finishing details like trim, paint, and hardware. Missing any one of these phases is what causes most mid-project slowdowns.
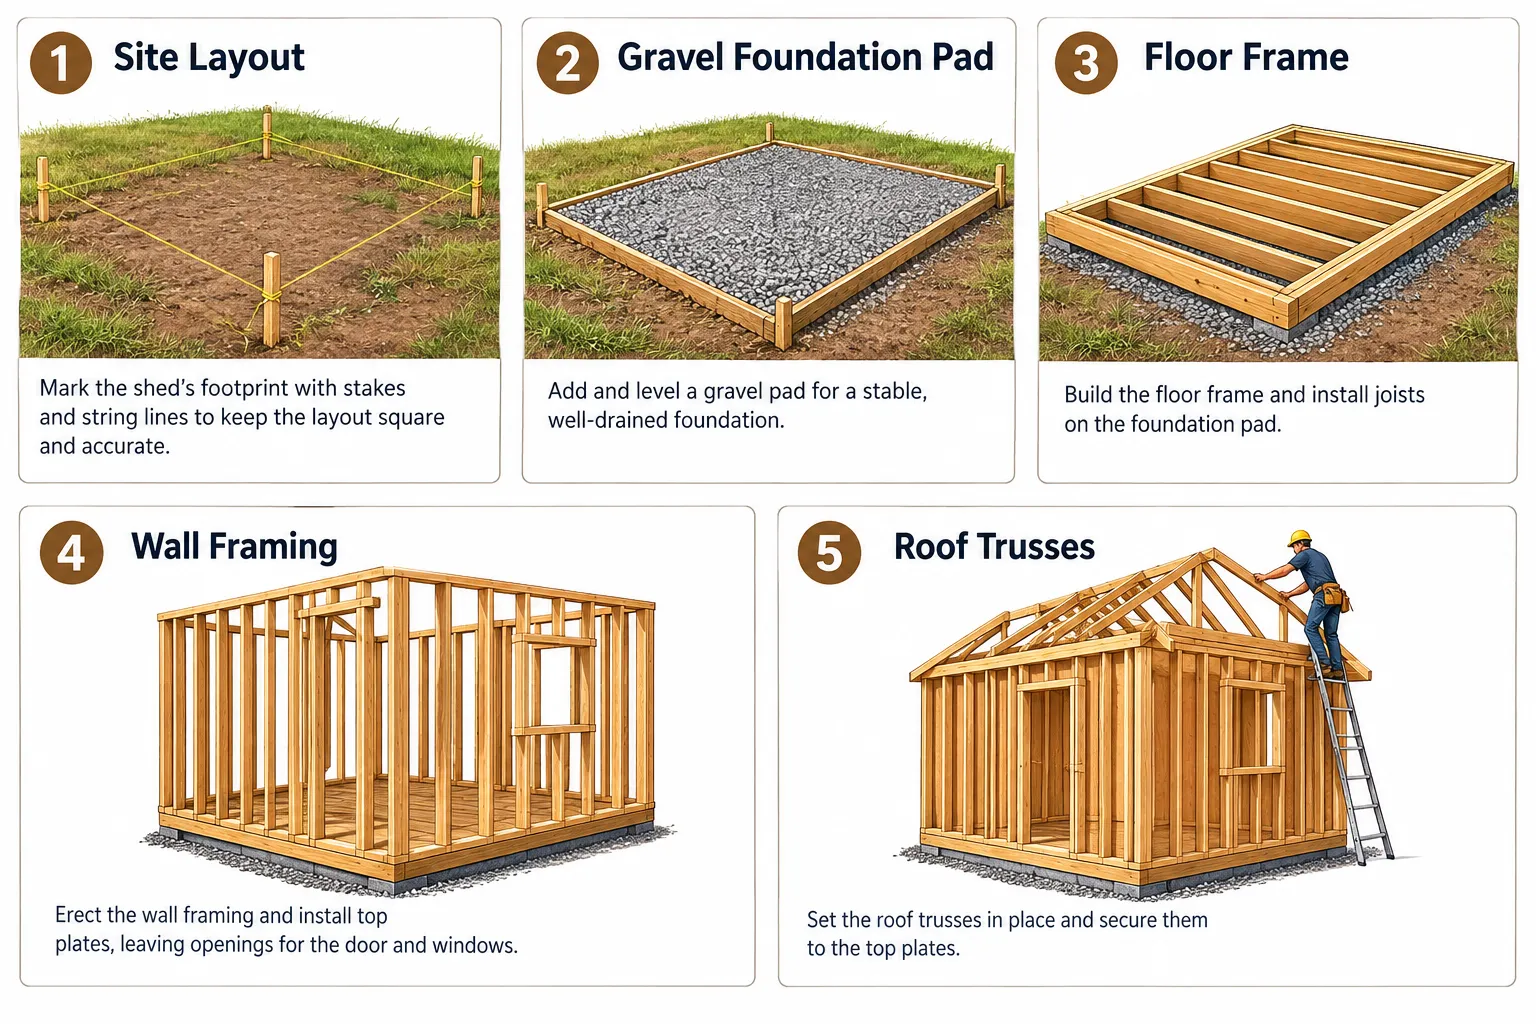
Here is a condensed version you can copy onto paper or a clipboard pad:
Phase 1: Planning
- Confirm local permit rules and setback requirements
- Choose shed size, roof style, and door placement
- Select plans or draw a simple floor plan
- Estimate material list and total budget
Phase 2: Site Prep
- Mark the footprint with stakes and string
- Clear grass, roots, and debris
- Check for slope and drainage direction
Phase 3: Foundation
- Choose foundation type (skid, gravel pad, or concrete piers)
- Level and compact the base
- Square the foundation corners (measure diagonals)
Phase 4: Framing
- Build and square the floor frame
- Frame walls on the ground, then stand them up
- Install rafters or trusses
Phase 5: Roof and Siding
- Add roof sheathing, underlayment, and shingles or metal panels
- Install siding and trim
- Hang doors and windows
Phase 6: Finish Work
- Caulk seams and paint or stain
- Install hardware, shelving, and ramps
- Final walkthrough and touch-ups
If you want a more detailed starting point before building your own list, The Complete Guide to Building Your Own Backyard Shed walks through each phase with more technical depth.
How Long Does It Take to Build a Shed From Scratch?
Most beginners building an 8×10 or 10×12 shed should budget 3 to 6 full weekends, assuming good weather and basic carpentry skills. Experienced hobbyists working alone can sometimes finish a simple gable shed in 4 to 5 consecutive days.
Timeline depends on a few specific variables:
- Foundation type: Gravel pads take a weekend; poured concrete needs curing time, adding days.
- Roof complexity: A simple lean-to roof goes up faster than a gambrel or barn-style roof.
- Helper availability: Wall framing is much faster with a second set of hands to hold panels plumb while you nail or screw them in.
- Material delivery: Lumber yard delays can stall a project before it even starts.
Choose a simpler roof and skid foundation if your main goal is speed. If you are building during a short seasonal window, start early so weather doesn’t eat into your weekends. For a beginner-friendly build timeline, see Best Shed Plans for Beginners: Simple, Step-by-Step Builds.
What Tools Do You Need to Build a Shed Yourself?
A basic shed build requires a circular saw, cordless drill, speed square, 25-foot tape measure, 4-foot level, and a framing hammer or nail gun. Most beginner builders already own or can rent everything on this list without buying specialty equipment.
Core tool checklist:
- Circular saw, or miter saw, for framing cuts
- Cordless drill/driver with multiple bits
- Framing square and speed square
- 4-foot and torpedo levels
- Chalk line for marking straight runs
- Claw hammer or 18-gauge/16-gauge nail gun with compressor
- Ladder (6-foot minimum for roof work)
- Safety glasses, work gloves, and ear protection
A common mistake is buying expensive tools before confirming the shed design actually needs them. If your plan calls for simple butt joints and pre-cut lumber, you rarely need a table saw. For a broader rundown of what belongs in a home shop, Various Tools Used for Woodworking is a useful companion reference.
How Much Does It Cost to Build a DIY Shed?
A DIY shed typically costs between $1,500 and $7,000, depending on size, foundation type, and siding material. An 8×10 storage shed built with basic materials sits toward the lower end, while a 12×16 shed with upgraded siding and a shingled roof runs higher.
Rough cost breakdown by category:
| Category | Typical Share of Budget |
|---|---|
| Lumber and framing | 35-40 percent |
| Roofing materials | 10-15 percent |
| Siding and trim | 15-20 percent |
| Foundation materials | 10 percent |
| Doors, windows, hardware | 10-15 percent |
| Paint, caulk, fasteners | 5-10 percent |
Choose pressure-treated lumber and a gravel pad foundation if you want to keep costs near the lower end. For a line-by-line cost model, How Much Does It Cost to Build a Small Shed? breaks down pricing by shed size, and DIY Shed Building Cost Comparison: Hire Help vs. Go Solo compares labor savings against hiring a contractor.
Can You Build a Shed Without a Foundation?
Technically, yes, but it is not recommended for anything beyond a very small, temporary structure. Skipping a foundation leads to uneven settling, wood rot from ground contact, and doors that stick within a year or two.
Ground prep and foundation steps that belong on your checklist:
- Mark and clear the footprint, removing sod and roots
- Check the slope with a level; grade away from the shed for drainage
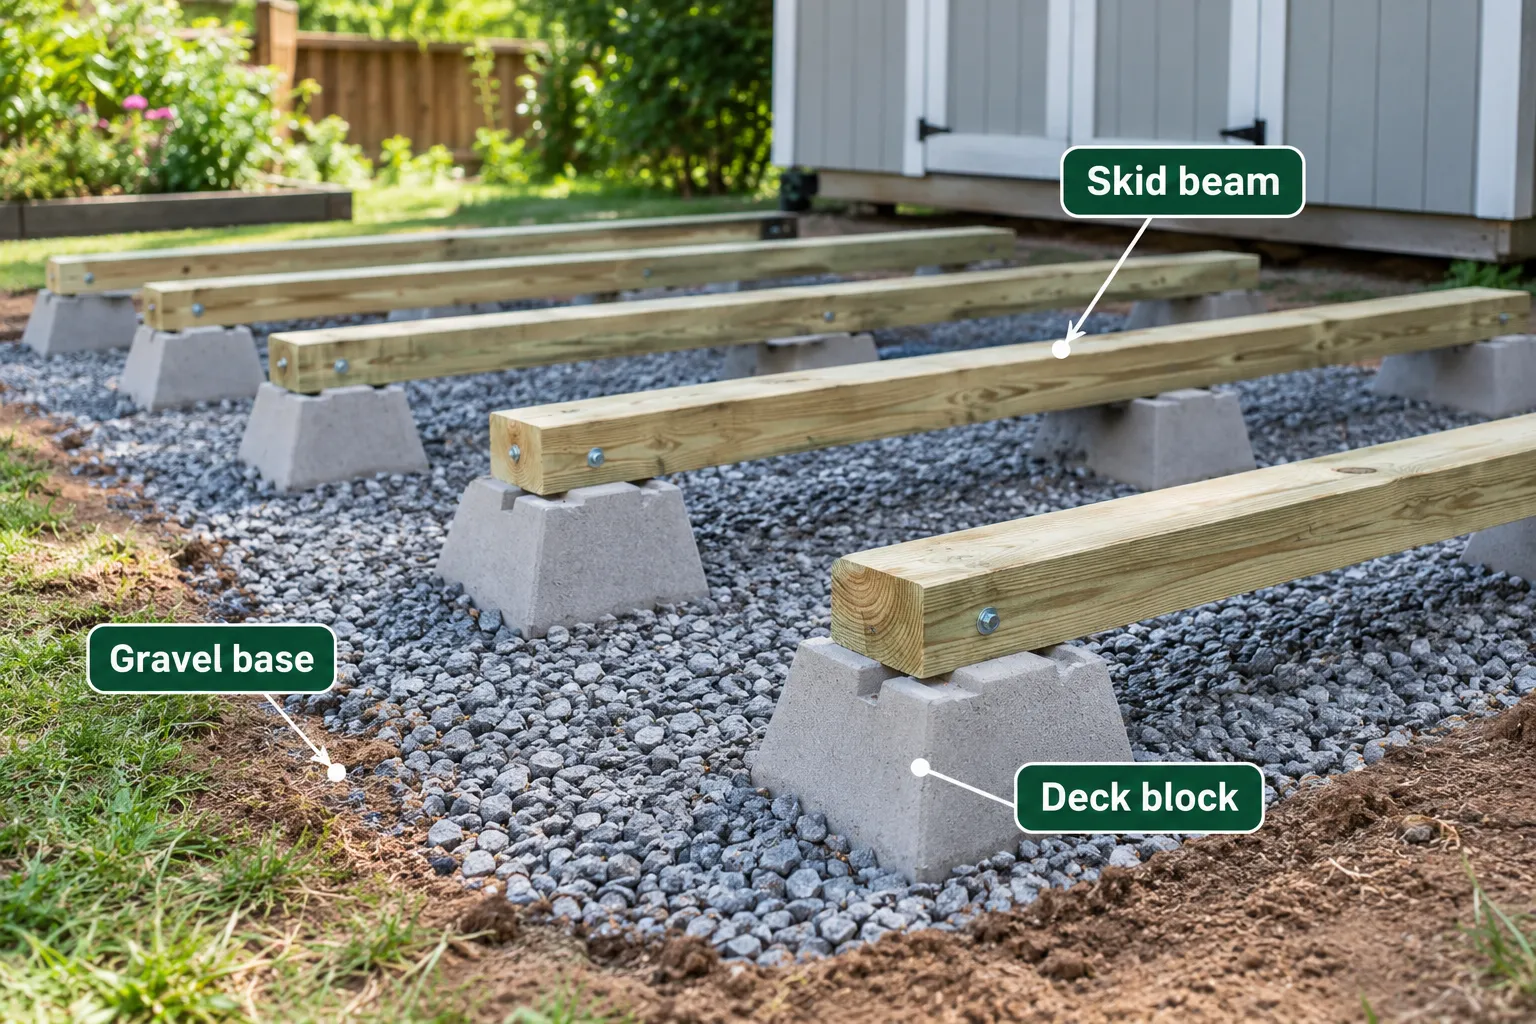
- Lay and compact a 4-inch gravel base for drainage and leveling
- Set concrete deck blocks or piers at the corners and midpoints
- Lay pressure-treated skids across the blocks, checking level in both directions
- Confirm square by measuring both diagonals; they should match
A gravel pad with skids works well for sheds under 10×12 on flat, well-drained soil. For larger sheds, sloped lots, or heavy snow regions, a poured concrete slab or frost-protected footings are the safer choice.
Do You Need a Permit to Build a Backyard Shed?
Many cities and counties exempt sheds under 120 square feet from building permits, but this threshold is not universal and must be confirmed with your local building department before you dig a single footing. Some jurisdictions base the exemption on height, setback distance from property lines, or whether the shed has electrical or plumbing connections rather than square footage alone.
Before finalizing your shed size, check:
- Maximum square footage allowed without a permit in your zoning district
- Minimum setback from property lines, fences, and easements
- Height restrictions (often 10 to 15 feet to the roof peak)
- Whether running electrical service to the shed triggers a separate electrical permit
If you plan to wire the shed for power tools or lighting, review How to Wire a Workshop Shed for Power Tools Safely and Correctly early in the planning phase, since electrical work often changes your permit requirements.
Shed Building vs. Buying a Prefab Kit: What’s the Difference?
Building from scratch generally costs less and gives you full control over size and layout, while a prefab kit saves time and reduces the skill required, at a higher price per square foot. The right choice depends on your budget, timeline, and comfort with basic carpentry.
| Factor | DIY from Scratch | Prefab Kit |
|---|---|---|
| Upfront cost | Lower, especially for simple designs | Higher per square foot |
| Customization | Full control over size, layout, and windows | Limited to kit options |
| Skill required | Moderate carpentry skills are needed | Minimal; mostly assembly |
| Time investment | 3-6 weekends typical | 1-2 weekends typical |
| Long-term durability | Depends on build quality | Consistent, factory-tested |
Choose scratch-built if you want a custom size or enjoy the hands-on process. Choose a prefab kit if time is tight and you are comfortable paying more for convenience. A detailed side-by-side is available in Prefab Shed Kits vs. Building From Scratch: Cost Comparison.
Common Mistakes People Make When Building Sheds
The most common shed-building mistakes involve skipping ground prep, guessing at material quantities, and framing walls out of square. Each of these mistakes compounds as the build progresses, turning a small error into a major headache by the roofing stage.
Frequent mistakes to watch for:
- Skipping a level check before framing: an unlevel floor throws off every wall and door afterward.
- Underestimating fasteners and trim: buy 10-15 percent extra lumber and screws.
- Building walls out of square: always measure diagonals before standing a wall panel.
- Ignoring roof overhang: too little overhang lets water run down the siding.
- Forgetting flashing around doors and windows: this is a leading cause of hidden rot.
Is building a shed harder than it looks? For someone who has handled a drill and a saw before, no, the steps are logical and sequential. For a true first-time builder with zero tool experience, the learning curve is real but manageable if you follow a checklist and don’t rush the foundation stage. Reviewing How to Read and Use Woodworking Plans: Beginner’s Complete Guide before you start helps you catch measurement errors on paper instead of in lumber.
How Do You Waterproof a DIY Shed, and What Materials Work Best on a Budget?
Waterproofing a shed starts with drainage at the foundation, continues with flashing at every seam, and finishes with a quality paint or stain system on the exterior. Skipping any one layer shortens the life of the structure significantly.
Waterproofing checklist:
- Grade the site so water flows away from the shed on all sides
- Use pressure-treated lumber for any wood touching the foundation
- Install drip edge and flashing around the roof perimeter and above doors/windows
- Caulk all siding seams and fastener holes before painting
- Apply exterior-grade paint or stain rated for your climate, and reapply every 3-5 years
For budget-friendly material choices that hold up outdoors, pressure-treated pine framing paired with OSB or plywood sheathing and vinyl or LP SmartSide siding gives solid durability without premium pricing. For more detail on wood choices and rot prevention, How to Prevent Outdoor Furniture From Rotting covers protective finishing techniques that apply directly to shed exteriors. If you plan to use the shed as a workshop, also review the Workshop Shed Insulation Guide: Best Materials and R-Values Explained so moisture control extends to the interior as well.
Where Can You Find a Free Printable Shed Building Checklist?
The most reliable free printable checklists come from established woodworking and home-improvement sites, lumber yard customer resource pages, and shed plan providers that include a checklist alongside their blueprints. A trustworthy checklist should match the six-phase structure covered earlier in this guide: planning, site prep, foundation, framing, roofing/siding, and finishing.
When evaluating a free printable, check that it:
- Covers permit and setback research before material purchasing
- Includes a diagonal-measurement square check for the floor and walls
- List flashing and caulking steps, not just “install roof”
- Leave blank lines for your specific measurements and material quantities
If you are comparing free templates against paid plan packages that include fuller checklists and cut lists, Free vs. Paid Shed Plans: Find the Best Option for Your Project breaks down what each option actually includes.
Frequently Asked Questions
Do I really need a printable checklist, or can I just follow a set plan?
A plan set tells you dimensions and cut lists, but a checklist tracks sequence and phase completion. Use both together for the smoothest build.
What size shed is easiest for a first-time builder?
An 8×10 or 10×12 footprint is the sweet spot. It is large enough to be useful but small enough to frame and roof without extra helpers. See the 8×10 Shed Plans: Free Blueprint and Material List for a concrete starting point.
Should I pick a gable roof or something simpler?
A simple gable or lean-to roof is easiest for beginners. Best Shed Roof Style: Lean-To, Gable, or Barn, Which to Choose? Compares the build difficulty of each style.
Can I build a shed alone, or do I need a second person?
Most steps are solo-friendly, but wall-raising and roof sheathing go much faster and are safer with a second set of hands, even briefly.
How do I know if my checklist is missing something important?
Compare it against the six core phases in this guide. If your list jumps from “foundation” straight to “paint” without framing and roofing steps broken out, it is too thin.
Will a shed checklist help me avoid rot problems later?
Yes, if it includes flashing, caulking, and finish steps specifically, not just “build walls” and “add roof.” Waterproofing has to be planned, not added as an afterthought.
Is it cheaper to build a shed myself than to buy one?
In most cases, yes. DIY builds typically run lower per square foot than prefab kits of comparable size, though the gap narrows if you have to rent tools you don’t already own.
Conclusion
A DIY Shed Building Checklist (Printable) turns a sprawling weekend project into a sequence of manageable steps. Print the six-phase list from this guide, pin it to a clipboard, and check off each task as you go: planning, site prep, foundation, framing, roofing and siding, and finish work. That order matters more than any single tool or material choice, because each phase depends on the one before it being done right.
Before you buy a single board, confirm your local permit rules, measure your site, and decide whether a scratch-built shed or a prefab kit fits your timeline better. Then work the checklist one weekend at a time. The payoff is a storage building, workshop, or backyard retreat that you built with your own hands, and a printed checklist with every box checked off to prove it.
Products, Tools, and Resources Worth Having on Hand
A few items consistently make shed builds go more smoothly for beginners:
- A 4-foot level and a torpedo level are used together to catch both long-run and tight-corner leveling issues.
- A cordless impact driver with spare batteries, since shed framing burns through battery charge faster than smaller furniture projects.
- A chalk line reel, handy for marking long, straight reference lines across sheathing and siding.
- Exterior-grade caulk and a quality paint sprayer or brush set, since the finish coat is what actually protects the structure long term.
- A printed or laminated version of your checklist, clipped to a board so it survives dusty hands and occasional rain.
If this is your first large outdoor build, pairing this checklist with a full plan set, such as the options compared in Custom vs. Standard Shed Designs: What’s Worth the Upgrade?, gives you both the sequence and the specifications you need to build with confidence.